Creating a Virtual Environment for the OpenShift Platform Using Oracle VirtualBox
Posted: February 23rd, 2014 | Author: sabre1041 | Filed under: Technology | Tags: OpenShift, VirutalBox | No Comments »Now, we will set up the broker and node virtual machines. Begin the process of creating the Broker by selecting the New icon in the VirtualBox Manager. Enter an appropriate name for the machine, select Linux as the type and then Fedora (64 bit) or Red Hat (64 bit) as the version depending on the operation system chosen select Continue.
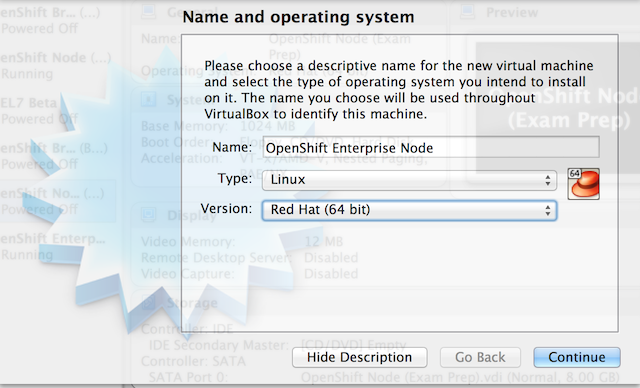
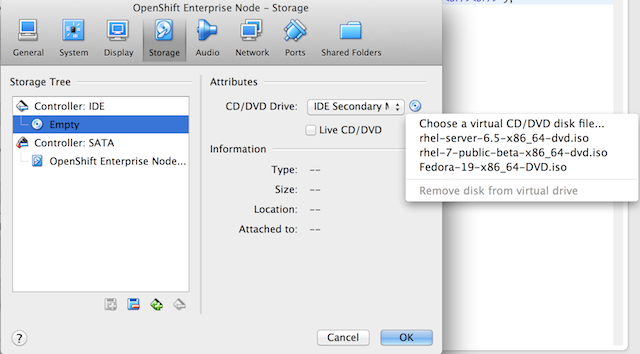
Broker and nodes require at least 1GB of memory. Allocate a value greater than 1024MB and select Continue. Next a hard drive will need to be created for the virtual machine. Select Create a virtual hard drive now and click continue. VirtualBox provides interoperability with other virtualization software by providing several hard drive formats. If you intend to only utilize VirtualBox for the OpenShift environment, choose the VDI format and select Continue. Next, a hard drive strategy must be chosen for the new hard drive. Unless you intend to use this environment in a production setting where high disk performance is required, choose Dynamically allocated. This option will reduce the initial size of the virtual hard dive. Select continue to specify the location the drive will be created and the size of the disk. The OpenShift platform requires a minimum of 8GB for Broker and Node instances. Select appropriate values and select Create to create the virtual machine. Prior to starting the machine, additional configurations are required with respect to providing the installation media and network configuration. Locate and select the machine from the VirtualBox Manager created using the name created earlier and click Settings. To provide the operating system installation media, select the Storage tab and select the Empty IDE controller. Select either the optical drive or in most cases, select the CD icon to browse for an image of the operating system.
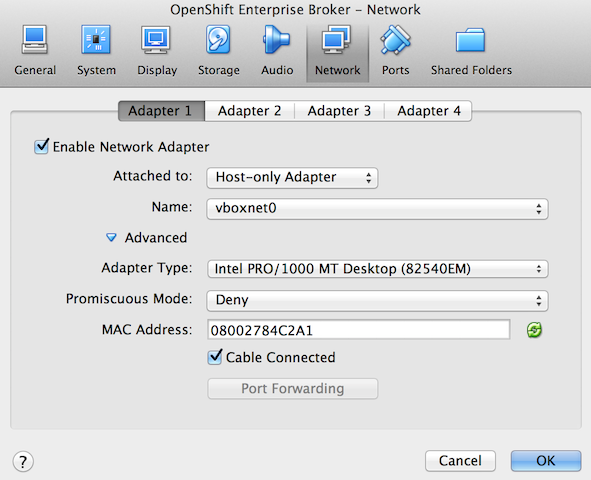
Next, select the Network tab where we will configure our two network adapters in the modes described earlier. Under Adapter 1, change the “Attached to” dropdown to Host-only Adapter” and verify the name is set to “vboxnet0”.
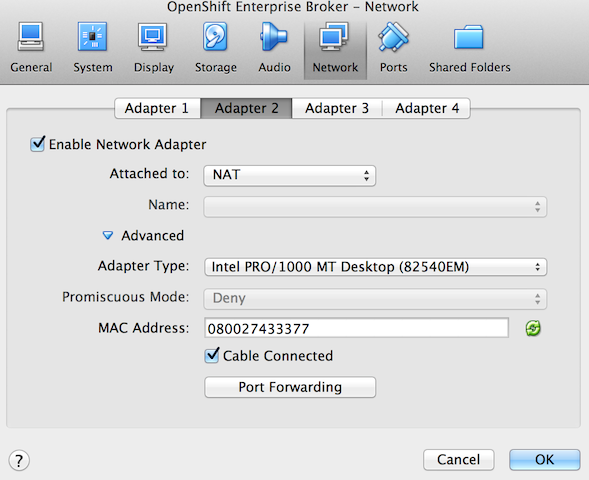
Select the Adapter 2 table and check “Enable Network Adapter”. Under “Attached to”, select NAT. To save the configurations, click OK. Repeat the steps above to configure the Node virtual machine.
Note: Nodes typically require the allocation of additional resources compared to a broker as they contain OpenShift cartridges and gears.
Leave a Reply