The introduction of OCI registries as a medium for storing Helm charts brought a number of advantages as compared to traditional Helm repositories including the ability to leverage the same infrastructure and primitives as standard containers along with reducing the overall effort that it takes to serve Helm charts for others to consume. However, even as the adoption of OCI based Helm charts continues to increase, there are several limitations compared to their traditional Helm Chart repository counterparts. Examples of these limitations include the inability to organize multiple charts amongst each other or the ability to search for charts that are stored within OCI registries.
A recent discussion within the Helm project GitHub repository brought to light a new method for which OCI based Helm charts could be managed. Charts stored in Helm repositories make use of an Index file which defines not only the charts that are being served, but the remote source where they are located.
As illustrated by the index file above, the urls field specifies the location of the packaged chart. While the majority of Helm chart repositories serve packaged charts alongside the index file, this is not a hard requirement and a packaged chart could be served by any accessible location.
Under the covers, Helm utilizes an interface (Getter) for accessing charts stored in remote locations. As one can expect, there are two implementations of the interface: accessing charts stored in Helm charts repositories as well as OCI registries. The determination of which method to use is determined by the protocol specified within the URL. URL’s specifying the http or https scheme access charts from traditional Helm repositories, while those with the oci scheme access charts from OCI registries.
The mechanisms for which Helm retrieves remote chart content based on the specified protocol enables using a Helm index in new ways. Instead referencing the location of the packaged chart stored within an HTTP server, the chart could instead be stored in an OCI registry. All that needs to change is the location of the chart specified in the urls field. This reference needs to include the oci:// protocol so that the underlying functionality for retrieving OCI based charts is activated. Let’s see how we can accomplish this capability.
Enabling OCI Charts in Chart Repositories
First, create a new Helm chart called my-chart:
helm create my-chart
Package up the chart
helm package my-chart
We will create a second version of the chart so that the chart index we will build includes multiple versions. To increment the chart version, use the yq utility which enables modifying YAML based content. If yq is not currently installed on your machine, navigate to the project website and follow the steps to download and install in your machine.
Once yq has been installed, update the version of the my-chart Helm chart to version 0.1.1:
yq -i '.version = "0.1.1"' my-chart/Chart.yaml
Package the updated chart
helm package my-chart
At this point, there are two packaged charts in the current directory (versions 0.0.1 and 0.1.1). Before publishing these charts to an OCI registry, set an environment variable called HELM_REGISTRY_REFERENCE representing the reference of the remote registry where the charts will be stored (for example: myregistry.com/charts).
Next, generate a Helm index file based on charts stored within the current directory
helm repo index .
With the index file generated, use yq to dynamically update the URL within the index file to reference the location of the chart in the OCI registry instead of the default path generated by Helm.
View the contents of the index file and you will notice that each chart version utilizes an OCI based reference in the urls field, enabling the use of the charts stored in the OCI registry.
NOTE: ${HELM_REGISTRY_REFERENCE} in the example above will be rendered in your version
The index file can then be uploaded to an HTTP based web server for broader distribution and use by others. There are a number of options for which the index file can be hosted, including GitHub Pages. Otherwise, since the file only needs to be served briefly, we can use python to start a minimalistic web server locally.
Execute the following command to start the web server on port 8000 using the contents from the current directory.
python -m http.server
Confirm the index file is being served properly
curl http://localhost:8000/index.yaml
Now that the chart repository has been configured and confirmed to be accessible, add a new repository called repo-oci and update the contents.
With all of the steps now complete for leveraging OCI based charts within chart repositories including adding the associated repository to the local machine, you can begin to use it it similar to any other helm repository, including searching for all charts and versions available
helm search repo repo-oci/ --versions

NAME             	CHART VERSION	APP VERSION	DESCRIPTION
repo-oci/my-chart	0.1.1        	1.16.0     	A Helm chart for Kubernetes
repo-oci/my-chart	0.1.0        	1.16.0     	A Helm chart for Kubernetes
Confirm that typical operations for for interacting with a chart can still be achieved, such as inspecting the contents of the Chart.yaml file using the helm show chart command:
helm show chart repo-oci/my-chart

apiVersion: v2
appVersion: 1.16.0
description: A Helm chart for Kubernetes
name: my-chart
type: application
version: 0.1.1
You can even choose to install one of these charts to a Kubernetes cluster using the helm install or helm upgrade commands. However, since
Capabilities surrounding the use of OCI artifacts continue to evolve both within the Helm project and in the OCI community. However, until new features become more readily available which offers an improved experience working with OCI based content, the ability to combine the use of Helm repositories and registries provides a suitable middleground in the meantime.
For the first time, Red Hat Summit and AnsibleFest, the premier Open Source event, moves away from one of the coastal cities of the United States and ascends to the mile-high city of Denver Colorado and the Denver Convention Center. For me, personally, I am excited about venturing into somewhat uncharted territory in this new venue city.
The technology industry embodies similar themes as well. As new technologies emerge, we are enamored about the possibilities and experimentation is the name of the game — and what better way to do so than in Open Source. We are experiencing an AI revolution where it is becoming a player in almost every industry vertical. AI is being integrated into products and solutions to be able to realize the benefits that the technology can bring. There is a certain buzz surrounding AI and you can bet that AI will be front and center at the Summit this year as it has with other industry events. Of course, I too am looking forward to hearing how Red Hat customers see AI helping transform their organization so that it can help realize the benefits that the technology. These benefits can then be shared more broadly in true Open Source fashion.
This year, I have the honor to participate once again at Red Hat Summit and will take part in several different sessions throughout the week. Each day, will undoubtedly be action packed and if any of the following sessions are of interest to you, I encourage you to join in:
OpenShift Commons SIG Security at Community Day
Monday May 6 – 1:30pm-3:30pm MDT – Colorado Convention Center Room Room 604
For the first time, the communities of RHEL, Ansible and OpenShift will come together for a day of collaboration on Monday May 6th, one day prior to the kickoff of Red Hat Summit. Associated with this event, Andy Braren, principal software engineer, Sean Rickerd, Principal Product Manager, and I will be holding a session sponsored by the OpenShift Commons Security Special Interest Group (SIG) focused on the many different aspects of Security within OpenShift. From the infrastructure supporting the platform to each and every application, security plays a pivotal role. However, every user and organization adopting OpenShift manages security in their own way. Together, we can not only learn from others, but most importantly, develop approaches to make our environments more secure.
This session will bring like minded individuals concerned with securing OpenShift and the many different principles, tools and methodologies for a series of collaborative discussions in a roundtable format. Learn from other, share stories and collaborate. This will be a can’t miss session for anyone interested in OpenShift security and especially those who have a desire to learn from others.
Click here to learn more about the session and register!
Red Hat TV – OpenShift Virtualization and Ansible
Red Hat TV is Red Hat’s streaming platform that features the latest technology trends from Red Hat partners, customers and experts. During Red Hat Summit week, Alan Cowles, Principal Product Manager, and I will demonstrate the deep integration between Ansible and OpenShift Virtualization that enables end users to leverage the benefits of Ansible Automation in a new way. The entire lifecycle of Virtual Machines, from initial deployment, configuration and day-2 management, can be automated using many of the same tools and approaches that users of Ansible have become accustomed to. In addition, Ansible can also be used to simplify the migration of virtual machine into OpenShift from other environments, building upon the capabilities within the Migration Toolkit for Virtualization (MTV).
While this session will not be streamed live from the event, the content will be made available at a later time on the Red Hat TV platform.
Platform Engineering Breakfast
Wednesday May 8 – 7:00am-8:00am MDT – Colorado Convention Center Rooms 109/111
Have a craving for Platform Engineering (PE)? Start the 2nd full day of Red Hat Summit and join various Red Hat experts and Red Hat customers who have an interest in growing trend of Platform Engineering to develop toolchains and workflows that can be offered as a product to developer teams. These roundtable based sessions will encourage conversations and collaboration to hear how users and organizations have implemented the concepts surrounding Platform Engineering including the tools and methodologies to understand what has worked well and what hasn’t. As a maintainer of a popular Developer Portal, Backstage (the upstream project of Red Hat Developer Hub), I work with the community to build tools that enable Platform Engineers to provide the best experience possible for their users.
Qualm your morning hunger and participate in what I am sure will only make you hungry for more!
This breakfast is ancillary to Red Hat Summit, so to take part including learning more and registry, click here.
Java Integration with the Sigstore and Red Hat Trusted Artifact Signer Ecosystem Lightning Talk
Thursday May 9 – 8:30am-8:50am MDT – Colorado Convention Center Summit Discovery Theater 2
The final session that I will be participating in during Red Hat Summit week is the presentation that I am most excited about, a lightning talk on “Software signing and verification with Red Hat Trusted Artifact Signer and Sigstore in the Java ecosystem”. Not to diminish any of the prior sessions, but one of the Open Source projects where I have an active role is Sigstore. The goal of the Sigstore project is to provide an ecosystem of tools that can be used to strengthen the security posture of software by simplifying the process for signing and verifying content. Applying digital signatures can be challenging and the goal of the Sigstore project is to provide end users with the tools they need to strengthen their software supply chain. In addition to the upstream project, I also have an active role within the Red Hat Trusted Artifact Signer team, Red Hat’s distribution of the Sigstore project, to ensure that the best experience possible is attained by our customers.
One of the ways that assets from the Sigstore project can be used is within Java based applications. Java remains near and dear to my heart and I will be speaking in a lightning talk format to share how Java applications can take advantage of the tools provided by the Sigstore project as well as how the Java ecosystem plays a role within the project. This fast-paced session will immerse attendees into the various Sigstore components, their role, and how they can be used by Java applications. No lightning talk would be complete without a demo and many of the assets the are demonstrated will be made available afterward so that attendees can use them in their own environment.
Click here to learn more about the session and to register!
Don’t Miss out on all the fun!
In addition to the aforementioned sessions, I’ll also be roaming around the Red Hat Services booth which is located in the Expo hall where you can not only find members from the Red Hat Consulting team, but also connect with Red Hat Technical Account Manager and Red Hat Training teams. Meet the experts, learn about training opportunities, engage in a Walk the Walls, and don’t miss the Escape Room.
There’s just so much going on during the week of Red Hat Summit and AnsibleFest that you do not want to miss out. To learn more about Red Hat Summit, AnsibleFest and all of the other activities, click here.
The cloud native world recently descended upon the city of lights in Paris for the 2024 edition of KubeCon + CloudNativeCon EU. As for what has become the norm, the main conference was filled with three days of keynotes, breakouts, and the ever popular Partner Pavilion consisting of a dizzying array of vendors and CNCF projects sharing their offerings. All of this was preceded by a series of co-located events that brought together individuals and organizations focusing on some of cloud native’s most popular projects and initiatives. Looking back at a wild and action packed week, I wanted to share my thoughts, opinions and experiences reflecting upon the week and what it means looking forward toward the future.
An Entire Conference Before the Conference
While many attendees focus on attending just the primary KubeCon + CloudNativeCon event, the conference in all reality kicks off the day prior with the day-0 events. Each KubeCon + CloudNativeCon features co-located events comprising some of the current most popular projects and technologies, like BackstageCon, Cloud Native AI day, and Platform Engineering day, along with familiar staples like ArgoCon and OpenShift Commons Gathering. ArgoCon and OpenShift Commons Gathering were the two co-located events that I participated in, and while the activities at ArgoCon will be described in detail later on, OpenShift Commons Gathering certainly did not disappoint.
OpenShift Commons Gathering this time around took place at the Gaumont Aquaboulevard, a movie theater that was approximately a 15 minute walk from the main venue. The format was somewhat unique to past gatherings as for most of the day, there were two concurrent tracks: the main stage and a series of focused breakout sessions.
Each of the breakout sessions lasted approximately one hour and enabled attendees to immerse themselves in a particular topic area and to collaborate with other members of the OpenShift community. I, along with my good friend Piotr Godowski from IBM held an interactive breakout session focused on all things security. Not only did we touch upon many of the best practices that are involved for securing containers and the OpenShift platform, but we made the session as engaging as possible as attendees were able to provide their input and feedback within a real time survey platform based upon how they are currently addressing common security concerns and how their efforts are prioritized compared to other IT initiatives. The theater style seating also helped encourage and foster conversations between participants which helped maximize the value that the session could provide. The survey responses will be used to establish future topics for OpenShift Commons initiatives including follow up sessions at future OpenShift Common Gathering events.
For more information on OpenShift Commons including learning more about how to get involved with the community, check out the OpenShift Commons website.
OCI Artifacts Take Center Stage
OCI (Open Container Initiative) artifacts enables the packaging and storage of additional content types aside from container images within traditional OCI registries. OCI artifacts are not new as they have been used for several years now (see the support for storing Helm Charts within OCI artifacts), but recent announcements have helped bring it to the forefront. Just prior to KubeCon, OCI specification v1.1.0 was released that solidified how OCI artifacts are defined and managed. There is a good blog post that was published by the Microsoft Azure Container Registry team that highlights many of the changes and enhancements that are part of the OCI v1.1.0 specification.
Discussions surrounding OCI artifacts were part of both the co-located events as well as the main KubeCon + CloudNativeCon event as I was fortunate enough to speak to the benefits, the features that it enables and how the community can participate.
OCI Artifacts to the Masses
AI and ML is undoubtedly the hottest topic in the tech industry these days. As the community and organizations come to grasp the ways that AI and ML technologies can be utilized, one such area of focus is the ability to manage and utilize ML based models in a scalable way. While S3 is one such option for serving these types of models, OCI artifact represents an alternate solution that not only provides the storage and management capabilities, but also enables the reuse of many of the other technologies that have been developed to support traditional containers including security and provenance.
Attendees of KubeCon + CloudNativeCon got a first glimpse into the world of OCI artifacts and their possible use as they were mentioned several times during the keynotes as well as within dedicated breakout sessions (see below).
GitOps Management using OCI Artifacts in Argo CD
One of the efforts that I have been spearheading for some time now is the ability to manage GitOps assets more natively in Argo CD. At the Argo Con co-located event, Christian Hernandez, Dan Garfield and Hilliary Lipsig and I held a panel that discussed a new proposal in the Argo CD community surrounding bringing first class support for handling GitOps content (content traditionally stored in Git repositories and standard Helm Chart Repositories).
The discussion offered insights into the challenges that OCI artifacts can help solve, how they can be used and ways to help join the community to bring these new sets of capabilities to fruition. The assets including the presentation and recording can be found below:
If you are interested in contributing or participating in the efforts surrounding Argo CD and OCI artifacts, feel free to join the #argo-cd-oci-integration channel on CNCF Slack. I personally, am excited to be able to work with members of the Argo CD community to bring these new opportunities to reality.
A Working Group dedicated to OCI Artifacts
The TAG App Delivery within the CNCF includes projects and initiatives related to delivering cloud-native applications, including building, packaging, deploying, managing, and operating them. As OCI artifacts represent a way to address many of the concerns that the TAG is tasked with, there is a working group within TAG App Delivery that is specifically focused on OCI artifacts. There are three key functions for the working group:
Gather End User Feedback
Advocate for Innovative Projects
Develop Common Patterns
To provide greater visibility and to provide an overview of the Artifacts WG within TAG App Delivery, I participated in a series of lightning talks that was held at the TAG App Delivery project booth that highlighted many of the associated efforts that the TAG is working on.
The presentation consisted of an overview of the challenges found with managing artifacts in a cloud native world, an overview of OCI artifacts, and some of the key areas that the working group is currently focusing on. Of course, any presentation at a conference included a demonstration that provided attendees an overview of some of the initial efforts to address one of the key concerns when managing artifacts effectively: searching for artifacts. The demonstration illustrated a recent feature that was added to the Zot container registry, a CNCF sandbox project, to enable artifact searching.
If there is an interest in participating in the Artifacts WG of TAG App Delivery, head over to the working group website on how to get involved including joining the #wg-artifacts Slack channel along with the bi-weekly community meeting. The presentation from the lightning talk can be found here.
Organizations taking note
While most organizations are just getting their hands on the concepts of AI/ML including OCI artifacts, others have identified the benefits that OCI artifacts can provide in this space and have started developing solutions to take advantage of the opportunities. Bloomberg shared how their internal Data Science Platform (DSP) is exploring the use of OCI Artifacts to manage their ML assets. They are still early in their journey, but it is exciting to see that organizations are recognizing the challenges and the potential ways that they will be able to take advantage of OCI Artifacts to achieve their business goals. I had the opportunity to meet with the presenters and will be seeing how they would be able to share their perspectives including experiences and roadmap back to the TAG App Delivery Artifacts WG group.
Managing OCI Artifacts
Looking across the cloud native landscape, from capabilities that are already in place, such as Helm, and those that are just at the incubation stage, there must be methods to support the management of assets as OCI Artifacts. ORAS (OCI Registry As Storage), a CNCF sandbox project, has become the de facto tool for managing OCI Artifacts and it is already in use by projects utilizing OCI Artifacts along with those that are just at the exploratory phase. Helm and Argo CD already use Helm within their projects and it will be the basis for the expanded use of OCI Artifacts by Argo CD. The Bloomberg team is also making use of ORAS as the reference library as part of their initial implementation.
I have been a maintainer of the ORAS project for some time now and it is refreshing to see so many Open Source projects starting to investigate and utilize ORAS. With each of these implementations making use of ORAS, they will be able to both provide concrete use cases as well as potential features that can be used to increase the capabilities of ORAS.
If you are interested in participating in the ORAS community, join the #oras CNCF channel or check out the ORAS website for more information.
The Helm Community Remains Strong
One of the primary reasons that I attended KubeCon was to be a representative of the Helm project leadership as a project maintainer at the conference. Events, like KubeCon + CloudNativeCon EU, is one of the ways to raise awareness into the current state and initiatives of Open Source projects with the community as a whole. The Helm project offered three ways for attendees to interact with the project:
There continues to be a good amount of interest in the Helm project and it was evident in the number of attendees who packed the breakout sessions and stopped by the booth in the Project Pavilion. Probably the most refreshing aspect was the number of attendees that both passed through the project booth and in the hallway tracks who voiced their support for the project including their willingness to offer their time and energy to contribute. This becomes increasingly important as the Helm project works toward the next major version: Helm 4. It is the community that will help guide the project into the next phase so that the appropriate features and capabilities are documented and tasked out appropriately. In fact, the entire contributor breakout session was dedicated to Helm 4 to provide attendees the opportunity to have a first glimpse into some of the areas the maintainers are envisioning as the key priorities to focus on.
If you are interested in learning more about the Helm project including how to contribute, visit the Helm website and/or join the #helm-users channel on Kubernetes Slack.
Conveying the Value of Open Source
Open Source projects are only as strong as the maintainers and contributors who take an active role. However, in today’s economic market, it has become increasingly difficult for many individuals to continue their participation in Open Source projects. This can be attributed to a variety of factors, but one such area that has seen a substantial dropoff from the past is individuals who are gainfully employed being able to have dedicated time for Open Source contribution.
While this may come as a surprise to many, it does make sense. Profits are at a premium these days and many organizations are focusing the efforts of their employees on areas that are within the bounds of the organization. The dropoff of eligible contributors has impacted many Open Source projects, causing them to either remain stagnant or become abandoned altogether. This disparity was highlighted in two ways at KubeCon.
First, Bob Killen, Program Manager at Google spoke directly on this topic in his presentation Why is this so HARD! Conveying the Business Value of Open Source. He illustrated the fact that there is often a disparity between time that employees dedicate on Open Source initiatives and leadership understanding what it can provide for the organization. Often, it is a lack of data. Without the facts; specifically the direct relationship and benefits for organizations, Leadership is unable to justify the time being spent and as a result, the pool of eligible contributors is reduced. I have seen it firsthand as a maintainer of several Open Source projects. There just isn’t as many contributors as there once were. However, if projects establish appropriate tooling, such as providing metrics that interested contributors could take back to their organization, they would be able to appropriately justify the time they are spending on these projects and the true value that it provides.
This specific challenge, where organizations relying on Open Source software should provide opportunities for their employees to dedicate time to associated Open Source projects was highlighted during the Flux and the Wider Ecosystem Planning Birds of a Feature (BoF) session. The future of Flux, a GitOps management tool and CNCF graduated project, was called into question as WeaveWorks, the commercial organization supporting the Open Source project, had recently ceased operations. Since a large number of contributors and maintainers of the Flux project were WeaveWorks employees, there was no clear understanding of what the future would hold once WeaveWorks ceased operations.
Alexis Richardson, former WeaveWorks CEO, and Stefan Prodan, maintainer of the Flux project, led the Birds of a Feather session in front of a packed KubeCon audience to address many of these concerns. As an individual who works in the Kubernetes GitOps space on a daily basis, it was great to see the overwhelming response from the community on what could have been a dire outcome. Thanks to corporate support from organizations, such as GitLab, the Flux project will indeed continue on into the future. However, Richardson was adamant that organizations who do utilize the project must dedicate time for their employees to contribute. And, without this level of support, more and more Open Source projects will unfortunately fall by the wayside.
KubeCon is All About the People
We all live in a distributed world where everyone in the community is spread across the entire globe. Events, like KubeCon + CloudNativeCon EU, offer the opportunity to bring together as many people from the community into a single location. While technology has certainly helped close the gap in terms of making distributed teams as productive as possible, nothing beats the face-to-face collaboration and “hallway type” conversations that a conference, like KubeCon, can enable. I cannot begin to count the number of individuals that I met up throughout the course of the week that I have either met up in various forums, like Slack, or associated with project level discussions.
In addition, to be honest, KubeCon has become literally a Red Hat reunion. Red Hatters, current and former, are everywhere; in almost every community. With that being said, I spent a good amount of time catching up with Red Hatters to hear about what projects that they are working on and their thoughts — past, present and future.
The Red Hat booth became a location where many of these conversations occurred. Once again, the Red Hat booth was a popular destination for all attendees where they had the opportunity to learn about Red Hat solutions and to interact with Red Hat experts. Each day, scores of attendees lined up for the chance to take home a coveted Fedora of their own. Throughout the conference, and even on the streets of Paris, the iconic red Fedoras were everywhere, illustrating the connection of the Red Hat brand with the market.
The Best KubeCon Yet
Looking back at the week that was in Paris, I can confidently say that it was the best KubeCon + CloudNativeCon EU that I have personally attended. Granted, we have come a long way since the first KubeCon + CloudNativeCon EU that I attended back in North America in 2021, the first post-pandemic.
Everything, from the location (who doesn’t love Paris in spring), to the venue (well appointed and right smack in the city of Paris along with being well connected by the citys’ robust transit system), made for an overwhelmingly enjoyable event. The vibe was infectious. 13,000+ attendees embracing Cloud Native and Open Source and having a blast at the same time. Of course, not everything was perfect. Several of the popular sessions were overcrowded with potential attendees overflowing out into the hallways. However, for the majority of the session, the room sizes were suited for the expected and actual attendance.
Looking forward, the CNCF announced the locations for the North American and European KubeCon + CloudNativeCon events for 2025 and 2026:
Europe 2025 – London – April 1-4, 2025
North America 2025 – Atlanta – November 10-13
Europe 2026 – Amsterdam – March 23-26
North America 2026 – Los Angeles – October 26-29
Salt Lake City, the location for KubeCon + CloudNativeCon NA in November 2024 has its work cut out to match the success of the KubeCon + CloudNativeCon EU Paris event. Fortunately, there are a continuous set of Kubernetes Community Days (KCD’s) running throughout the world, to satisfy the demand in the meantime.
January 25, 2020. At the time, just another day at Devconf.cz in Brno Czech Republic delivering hands-on workshops for an emerging concept in the Kubernetes space, GitOps. Looking back, it would become the last in person conference that I would have the opportunity to attend due to the COVID-19 pandemic.
Fast forward 21 months, and while the world continues to be ravaged by the pandemic, there are reasons to believe things are headed in the right direction. Case in point, KubeCon and Cloud Native Con 2021 where adopters and technologists from leading open source cloud communities come together and share the latest and greatest news within this space.
This, like many other conferences these days, will be available in a virtual format, but there will also be an in person participation as well. After all these months, I am excited to be able to participate on site at the event where I will be able to once again share some of my recent efforts with the community. The following are some of the areas that you can find me either at the physical event or virtually.
OpenShift Commons Gathering – AMA Session
When: Tuesday October 12, 2021 – 2:30 PM PDT
If you or your organization uses the OpenShift Container Platform, what else could be better than hearing about how the community uses OpenShift to drive application deployments to deliver real business value as OpenShift Commons Gathering once again returns to KubeCon as one of the Day-0 events.
As many of you are aware, one of my key responsibilities is to help organizations achieve success by delivering solutions with OpenShift. I will be joining a group of Red Hat engineers and guest speakers for an Ask Me Anything (AMA) session on the OpenShift ecosystem during the OpenShift Commons Gathering event. This session provides an opportunity for you to ask any burning questions that you always wanted to ask as well our thoughts on where we all see OpenShift and Kubernetes headed in the future.
GitOpsCon North America 2021 – Securing GitOps
When: Tuesday October 12, 2021 – 3:30 PM PDT
GitOps is no longer an emerging concept in the Kubernetes space as it might have been back in January 2020, and this is evident by the second GitOpsCon returning to KubeCon as another Day-0 event. Adopting a GitOps based approach is fundamentally a paradigm shift for managing both applications and infrastructure for many organizations. It is important that proper considerations be made to properly enforce property security controls at each step and component involved in GitOps.
This lightning talk on Securing GitOps will highlight many of the key areas that anyone implementing a GitOps based approach should consider for implementing GitOps securely. Not only will the key areas of concerns be highlighted, but a set of tools will be introduced that you can take advantage of immediately.
KubeCon North America 2021 – Helm: The Charts and the Curious
When: Wednesday October 12, 2021 – 11:00 AM PDT
Helm is a package manager for Kubernetes and is one of the most popular ways that applications are deployed to Kubernetes. Charts are the packaged Kubernetes manifests and there is a vast ecosystem out there for building, packaging and distributing.
This talk will focus primarily on how to accelerate and secure the packaging and distribution of Helm charts including some of the approaches and tools that you can integrate into your Continuous Integration and Continuous Delivery process. You really do not want to miss this session, especially those who do use Helm as part of their standard workflow.
Booth Duty
Aside from the formal presentations, I will also be on the expo floor working several of the booths. This affords you the opportunity to “talk shop” and experience open source and cloud native solutions in action.
Red Hat Booth
What should not come as a surprise, I will be present at the Red Hat booth at various times throughout the convention. Aside from stopping by to say hi, be sure to check the associated activities delivered by Red Hat’s best including demos, workshops and live office hours.
More information related to Red Hat’s presence at KubeCon can be found here.
sigstore Booth
One the open source projects that I am heavily involved in these days is sigstore, a Linux Foundation sponsored project that aims to make signing and verifying content easier. Stop by, learn and take the sigstore tooling for a spin by signing content of your very own. Trust me, as soon as you see it, you will be hooked!
I’ll be around for the entire week so feel free to contact me via my various social media channels (LinkedIn, Twitter, Facebook) if you are interested in chatting. For those who are not attending the in-person event in Los Angeles, happy to set aside time so that you do not miss out either.
A container image is a foundational component of any deployable resource in Kubernetes as it represents an executable workload. However, all images are not the same. An image with the name foo deployed on cluster A may not be the same as image foo on cluster B. This is due in part to the way that images are resolved at both the Kubernetes level as well as by the underlying container runtime.
When using Helm, the package manager for Kubernetes, the majority of publicly available charts do provide methods for specifying names of these backing images. Unfortunately, these options can lead end users into a false sense of security. In this post, we will describe the potential pitfalls that can occur when specifying image references within Helm charts along with options that can be employed by both chart maintainers and consumers to not only increase security, but reliability of their Kubernetes applications.
Whats in a Name
All container images are given names, such as the foo image referenced previously. In addition, a hostname and any hierarchical details of the registry where the image is stored may also be provided, such as quay.io/myco resulting in an image name of quay.io/myco/foo. If the hostname of the registry is not provided, a default hostname is provided by the container runtime. Either a set of configured additional or mirror registries are used, otherwise Docker Hub is the default.
The final optional portion of an image is a tag which identifies different versions of the same image. If no tag is specified, the latest tag is used by default. In Helm, a common pattern employed by chart publishers is to provide configurable values for each component of an image and typically represented by the following values:
While this configuration appears to be sensible given the composition of images, there are additional considerations that should be taken into account.
First, Kubernetes takes different approaches when it comes to satisfying the requirement that the image be available within the local container runtime. By default, the Kubernetes Kubelet will query the container runtime for the specified image. If found, a container will be started using this image. If the image is not found, it will be retrieved by the container runtime based on the configuration in the deployable resource. End users can modify this default behavior by specifying the imagePullPolicy property of the container. The imagePullPolicy can be one of the following values:
IfNotPresent (default) – Pull the image from the remote source only if it not present in the container runtime
Always – The Kubelet queries the remote registry to compare the digest value of the image. The image will be retrieved only if an image with the same digest is not found within the container runtime.
Never – Assumes the image is already available in the container runtime
Many chart maintainers provide the imagePullPolicy as a configurable value within their charts in order to allow the end user to control how images are retrieved.
There is one gotcha here. Even though the default imagePullPolicy is IfNotPresent, if the latest tag is specified, the imagePullPolicy is changed to Always when not specified. This subtle detail has been known to trip up even the more experienced Kubernetes user as a different image may be retrieved compared to a previous deployment even though no changes to the Kubernetes resource were made.
So, how can we avoid this type of situation?
Referencing Images by Digest
It is important to note that an image tag functions as a dynamic pointer to a concrete reference, known as a digest. A digest is an immutable SHA256 representation of an image and its layers. An image deployed yesterday with tag 1.0.0 may not reference the same underlying digest as it does today, which could cause adverse results depending on the contents of the updated image. Tags are provided for convenience purposes. It’s a lot easier to say “give me version 1.0.0” instead of “give me version image with reference sha256:d478cd82cb6a604e3a27383daf93637326d402570b2f3bec835d1f84c9ed0acc. Instead of using a tag to reference an image, such as quay.io/myco/foo:1.0.0, digests can be applied by adding @sha256:<digest> instead of the colon separator and tag name, such as quay.io/myco/foo@sha256:d478cd82cb6a604e3a27383daf93637326d402570b2f3bec835d1f84c9ed0acc.
Referencing images by digest has a number of advantages:
Avoid unexpected or undesirable image changes.
Increase security and awareness by knowing the specific image running in your environment.
The last point is increasingly important as more and more organizations look to tighten the grips on the software that is deployed. When combined with concepts like Software Bill of Materials (SBOM’s), it is crucial that the exact image that is defined matches the running image.
Supporting Image Digest in Helm Charts
Given that referencing a container image by digest merely involves a change in a Helm template, it should be fairly easy to implement. The primary challenge with this refactoring effort is the way the image itself is referenced. When using a Values structure for a image similar to the example provided previously, an image within a template file could be represented by the following:
The colon separator prior to the image tag presents the primary reason why using image digests is a challenge in most of the publicly available Helm charts since an image digest reference uses a @ after the name of the image instead of a :.
Note: It is possible to include the digest when using the above format as @sha can be suffixed to the name of the image. However, this approach is not recommended as it may affect other portions of the chart that may rely on the name of the image.
Freedom of choice is the name of the game, and chart maintainers (particularly those that support publicly available charts) should provide suitable options for consumers to choose from. While referencing images by digest does have many benefits as described previously, there is still a need to support those that may want the convenience of referencing an image by tag.
To satisfy both user personas, we can make use of a Helm Named Template to produce the desired image reference based on user input. A Named Template in Helm is a piece of reusable code that can be referenced throughout a chart.
First, let’s spend a moment reviewing thinking about how users should be able to specify the image so that the image reference can be correctly produced. Currently, as illustrated previously, the images dictionary accepts the name of the registry, repository and tag. Since the goal of this effort is to be able to support either a tag or a digest, let’s change the name of the tag property to version:
Now either a tag (such as 1.0.0) or a digest (such as sha256:d478cd82cb6a604e3a27383daf93637326d402570b2f3bec835d1f84c9ed0acc) can be specified in the version property.
The next step is to create the Named Template that will be able to produce the correctly formatted image reference. Named Templates, by default, are defined within the templates/helpers.tpl file (Any file starting with can be used to store Named Templates as it is convention in Helm that these files do not contain any Kubernetes manifests). The key to properly formatting the image reference is to be able to differentiate when the input is a tag versus a digest. Fortunately, since all image digests begin with sha256:, logic can be employed to apply the appropriate format when this situation is detected. The result is a Named Template called similar to the following:
{{/*
Create the image path for the passed in image field
*/}}
{{- define "mychart.image" -}}
{{- if eq (substr 0 7 .version) "sha256:" -}}
{{- printf "%s/%s@%s" .registry .repository .version -}}
{{- else -}}
{{- printf "%s/%s:%s" .registry .repository .version -}}
{{- end -}}
{{- end -}}
This Named Template called mychart.image first determines whether the first 7 characters of the version property contains sha256: using the Sprig substr function, which would indicate that it is an image digest reference. If so, a correctly formatted image reference is produced with the appropriate @ separator between the registry/repository and the digest. Otherwise, an image reference making use of a tag is produced.
The final step is to include the mychart.image Named Template within a Kubernetes template manifest. This is achieved by using the template function and providing both the name of the Named Template and the dictionary containing the image from the Values file.
Now, specifying either the tag or digest in the version property within a Values file as shown below will result in a properly formatted image reference.
By implementing this type of capability, chart producers enable consumers the flexibility for determining how images within charts should be rendered. The use of image digests has many benefits including security and an increased level of assurance of the content that is operating within a Kubernetes environment. It is the hope these types of patterns continue to proliferate within the Helm community.
OpenShift includes the capabilities to integrate with a variety of identity providers to enable the authentication of users accessing the platform. When an OpenShift cluster is installed, a default kubeadmin administrator user is provided which enables access to complete some of the initial configuration, such as setting up identity providers and bootstrapping the cluster.
While steps are available to remove the kubeadmin user from OpenShift, there may be a desire for the account to be retained longterm as one of the break glass methods for gaining elevated access to the cluster (another being the kubeconfig file that is also provided at installation time and uses certificate based authentication).
In many organizations, policies are in place that require accounts with passwords associated with them to be rotated on a periodic basis. Given that the kubeadmin account provides privileged access to an OpenShift environment, it is important that options be available to not only provide additional security measures for protecting the integrity of the account, but to also comply with organizational policies.
The credentials for the kubeadmin password consists of four sets of five characters separated with dashes (xxxxx-xxxxx-xxxxx-xxxxx) and is generated by the OpenShift installer and stored in a secret called kubeadmin in the kube-system namespace. If you query the content stored within the secret, you will find a hashed value instead of the password itself.
To properly rotate the kubeadmin password, a new password must be generated in a format that aligns with OpenShift’s standard kubeadmin password format followed by a hashing function being applied so that it can be stored within the platform.
There are a variety of methods in which a password representative of the kubeadmin user can be generated. However, it only made sense to create a program that aligns with the functions and libraries present in the OpenShift installation binary. The following golang program performs not only the generation of the password and hash, but the base64 value that should be updated in the secret as a convenience.
package main

import (
	"fmt"
	"crypto/rand"
	"golang.org/x/crypto/bcrypt"
	b64 "encoding/base64"
	"math/big"
)

// generateRandomPasswordHash generates a hash of a random ASCII password
// 5char-5char-5char-5char
func generateRandomPasswordHash(length int) (string, string, error) {
	const (
		lowerLetters = "abcdefghijkmnopqrstuvwxyz"
		upperLetters = "ABCDEFGHIJKLMNPQRSTUVWXYZ"
		digits       = "23456789"
		all          = lowerLetters + upperLetters + digits
	)
	var password string
	for i := 0; i < length; i++ {
		n, err := rand.Int(rand.Reader, big.NewInt(int64(len(all))))
		if err != nil {
			return "", "", err
		}
		newchar := string(all[n.Int64()])
		if password == "" {
			password = newchar
		}
		if i < length-1 {
			n, err = rand.Int(rand.Reader, big.NewInt(int64(len(password)+1)))
			if err != nil {
				return "", "",err
			}
			j := n.Int64()
			password = password[0:j] + newchar + password[j:]
		}
	}
	pw := []rune(password)
	for _, replace := range []int{5, 11, 17} {
		pw[replace] = '-'
	}

	bytes, err := bcrypt.GenerateFromPassword([]byte(string(pw)), bcrypt.DefaultCost)
	if err != nil {
		return "", "",err
	}

	return string(pw), string(bytes), nil
}

func main() {
        password, hash, err := generateRandomPasswordHash(23)

        if err != nil {
           fmt.Println(err.Error())
           return
        }
	fmt.Printf("Actual Password: %s\n", password)
	fmt.Printf("Hashed Password: %s\n", hash)
	fmt.Printf("Data to Change in Secret: %s", b64.StdEncoding.EncodeToString([]byte(hash)))
}
If you do not have the go programming language installed on your machine, you can use the following link to interact with the program on the Go Playground.
Hit the Run button to execute the program and a response similar to the following will be provided:
Actual Password: WbRso-QnRdn-6uE3e-x2reD
Hashed Password: $2a$10$sNtIgflx/nQyV51IXMuY7OtyGMIyTZpGROBN70vJZ4AoS.eau63VG
Data to Change in Secret: JDJhJDEwJHNOdElnZmx4L25ReVY1MUlYTXVZN090eUdNSXlUWnBHUk9CTjcwdkpaNEFvUy5lYXU2M1ZH
As you can see, the plaintext value that you can use to authenticate as the kubeadmin user, the hashed value that should be stored in the secret within the kube-system namespace and the value that can be substituted in the secret is provided.
To update the value of the kubeadmin password, execute the following command and replace the SECRET_DATA text with the value provided next to the “Data to Change in Secret” from the program execution above.
Once the password has been updated, all active OAuth tokens and any associated sessions will be invalidated and you will be required to reauthenticate. Confirm that you are able to login to either the OpenShift CLI or web console using the plain text password provided above.
It really is that easy to manage the password associated with the kubeadmin user. The ability for the password to be rotated as desired allows for the compliance against most organizational password policies. Keep in mind that the secret containing the kubeadmin password can always be removed, thus eliminating this method for authenticating into the cluster. The generated kubeconfig file provided at install time can be used as a method of last resort for accessing an OpenShift environment if a need arises.
Helm has become the de facto tool for packaging and deploying applications in a Kubernetes environment not strictly due to its ease of use, but also because of its versatility. What once was a complex process for managing applications now can be facilitated with ease. In more complex deployments, an application may have one or more components that it relies on for normal operation, such as a database for a front end application. Helm uses the concept of dependencies to define a relationship between the current chart and any other chart that is required to be deployed in order for a release to be deemed both complete and successful. In most cases, dependencies are sourced from Helm repositories, where a chart has been packaged and served on an external web server. An example of how dependencies can be defined in a Chart.yaml file can be found below:
However, another approach is to source dependent charts from the local file system. This method has several advantages including avoiding a reliance on any external resource (the chart repository) as well as the ability to test dependent charts that may also be in development without formal packaging to be complete.
Instead of specifying the location of the remote chart repository server using the http(s) protocol, the file protocol can be used instead:
The process of Installing a chart containing dependencies is the same regardless if they are sourced from a remote repository or the local file system. Dependent charts are referenced from the charts directory at install time and the helm dependency subcommand can be used to build or update the contents of this directory.
While the file system approach of managing dependent charts sounds appetizing, it does introduce challenges when it is time to version the Chart in a source code management tool, such as a Git repository. Do you want to include the entire contents of each dependent chart in your repository? As your git repository evolves with the content of your own chart (or others), including the contents from other dependencies within the same repository may cause unwanted and excessive bloat. As most charts that would be consumed as dependencies are stored in their own Git repository, an alternate method for sourcing dependent charts is to reference them from their own Git repositories using Git submodules. A submodule allows for a separate Git repository to be embedded within another repository. Some of the benefits using this approach is that only a reference to the associated repository is tracked instead of the entire contents. In addition, since the repository referenced in the submodule uses the fixed SHA of a given commit, it is akin to a tag that is commonly associated with a chart packaged within a helm repository. This ensures that the contents used today will be the same as in the future.
Dependencies also enable another approach used in the Helm ecosystem called subcharts. A subchart is a mechanism of providing inheritance to one or more charts as the parent of the associated subchart(s) can provide overriding values along with additional content (templates) of their own. To demonstrate an end to end overview of using Git submodules in Helm, let’s walk through an example to highlight how this approach can be accomplished.
The following repository contains the associated resources
By using the subchart approach, we are going to make use of the Quarkus Helm chart found within the Red Hat Developers Helm Chart repository as the subchart and specify overriding values within our parent chart.
Installing the Helm Chart
Before beginning, ensure that you have the following prerequisites satisfied:
Git
Helm CLI
Kubernetes CLI
First, clone the repository to your local machine and change into the repository directory:
git clone https://github.com/sabre1041/helm-dependency-submodules.git
cd helm-dependency-submodules
This chart provides many of the common attributes that you would find in any other chart including a values.yaml and Chart.yaml files.
The git submodule is located in the dependencies directory named redhat-helm-charts. However, if you list the contents of this directory, it will be empty.
ls -l dependencies/redhat-helm-charts/
This is due the fact that submodules are not initialized or updated to bring in the contents of the referenced repository when a repository is cloned by default. To clone the content of the submodule, initialize and update the submodule:
Initialize the submodule
git submodule init

Submodule 'dependencies/redhat-helm-charts' (https://github.com/redhat-developer/redhat-helm-charts) registered for path 'dependencies/redhat-helm-charts'
Update the submodule
git submodule update

Cloning into '<base_directory>/helm-dependency-submodules/dependencies/redhat-helm-charts'...
Submodule path 'dependencies/redhat-helm-charts': checked out '47ae04c40a4e75b33ad6a2ae84b09a173f739781'
If you inspect the contents of the Chart.yaml file, you will note the dependency referencing the quarkus helm chart within the submodule path:
Note: By default, the Quarkus Helm chart assumes a deployment to an OpenShift environment and therefore creates a Route resource. To skip the creation of the Route, pass in the --set quarkus.deploy.route.enabled=false flag to the helm update command.
A new namespace called helm-dependency-submodules will be created if it did not exist previously and the Quarkus application will be deployed. If running in an OpenShift, a new Route will be created exposing the application. Execute the following command to obtain the URL of the application.
kubectl get routes -n helm-dependency-submodules helm-dependency-submodules -o jsonpath=https://’{ .spec.host }’
Finally, uninstall the application by using the helm uninstall command as shown below
More and more organizations are adopting GitOps as a mechanism for managing applications. Argo CD is one such tool that implements GitOps principles and it provides support for not only Helm charts, but submodules found within Git repositories. Using the Git repository covered in the last section, let’s describe how Argo CD can facilitate deployment of the Quarkus application within the Helm chart to the Kubernetes cluster.
First, deploy an instance of Argo CD to the environment and ensure that the Argo CD controller has the necessary permissions to create a namespace and resources in a project called helm-dependency-submodules-argocd. There are multiple ways that Argo CD can be deployed including the community based operator, OpenShift GitOps when operating in an OpenShift environment, as well as static manifest files.
Once Argo CD has been deployed and is operational, create the Application using the manifest found in the argocd directory of the git repository.
Argo CD will take care of all the heavy lifting for us that we had to perform manually previously including:
Cloning the repository
Initializing and updating the submodule
Updating the chart dependencies
Installing the chart
Navigating to the quarkus Argo CD will illustrate the resources that were deployed and synchronized to the newly created helm-dependency-submodules-argocd namespace.
Application deployed using Argo CD
When changes are made to the repository, Argo CD will pick up the modifications and apply them based on the settings of the application.
By either using the Helm CLI or a GitOps based tool like Argo CD as described during this discussion, Git submodules can provide yet another approach by which Helm can be used to streamline the deployment and management of applications in a kubernetes environment.
The world of cloud native architectures have enabled solutions to be delivered faster than ever before. Even as the overall time to delivery has been reduced, one area that continues to be of utmost importance is understanding the contents of the software package at each level. In a containerized environment, this includes everything from the base operating system, core libraries, and everything in between including the application itself. The assurance that each layer meets an agreed upon standard prior to being deployed into a production environment is known as the Trusted Software Supply Chain (TSSC). This assembly line approach to software delivery typically makes use of Continuous Integration and Continuous Delivery (CI/CD) tool(s) in a series of processes, modeled in a pipeline of steps, that every application must undergo.
Given that there are various layers of a containerized application, when a change occurs at any layer, the entire validation process must be repeated to ensure that the application continues to meet the expected level of compliance. In a cloud native world, this can occur frequently and it is important that the revalidation process occurs as soon as a change is detected to mitigate any potential vulnerability. The primary questions to ask is how to detect when a change occurs and what should be done? The answer first depends on the source. If source code changes, an event can be triggered from the source code management (SCM) system. Similar actions can be undertaken when a container image is pushed to an image registry. Then, the event can trigger some form of action or remediation.
Within the context of the Trusted Software Supply Chain, the trigger will typically invoke a pipeline along with a series of steps. This pipeline execution engine can take many forms, but Tekton is one such tool that has been gaining popularity in the Kubernetes ecosystem as it makes use of cloud native principles, such as declarative configurations (Custom Resources) and a distributed execution model. In the scenario where an image is pushed to a container registry, a triggering action would invoke a Tekton pipeline that includes a series of Tasks (steps), such as retrieving the image, scanning, and validating the contents.
Triggering a Tekton Pipeline when an Image is pushed
In OpenShift, one of the key features of the platform is that it contains an image registry along with an entire ecosystem of resources to aid in the life cycle of images (Images, ImageStreams along with several virtual resources including ImageStreamTags). As container images are either pushed to the integrated registry or referenced in an ImageStream, the metadata contained within these custom resources are updated to reflect the latest values. These changes as with any change to a resource in OpenShift can be monitored (one of the key principles of Operators) to invoke other actions in response. Such an action could be the triggering of a Tekton pipeline. The remainder of this article will describe how Tekton pipelines can be triggered based on changes to resources in OpenShift using cloud native event patterns.
There are many components encompassing the Tekton project. While the primary feature set focuses on the pipeline itself, another subproject, called triggers, provides the functionality for detecting and extracting information events in order to execute pipelines. Tekton and the combination the pipelines and triggers subproject is only half of the overall solution. Another component must provide the capability for not only monitoring when changes occur within OpenShift, but have the capability to send events. The missing piece of the puzzle is Knative. Knative is a platform for building serverless applications, and similar to Tekton, the full feature set is broken down into several subjects. Knative serving is responsible for managing serverless applications while Knative eventing provides support for passing events from producers to consumers. The functionality of Knative eventing provides the desired capabilities of sending events based on actions from the Kubernetes API which are then consumed by Tekton triggers to start pipelines. The diagram below provides an overview of the end state architect.
High level architecture
To begin, you will need access to an OpenShift environment with cluster administrator rights.
Note: While the use case described in this implementation are specific to OpenShift, the concepts are applicable to any Kubernetes environment with the associated project deployed.
Then, you will need to install two operators from OperatorHub: OpenShift Pipelines which will provide support for Tekton and OpenShift Serverless, which will provide support for Knative.
Navigate to the OpenShift Web Console and select OperatorHub and then OperatorHub.
In the textbox, search for OpenShift Pipelines and then click Install. A page will be presented with the available channels and approval modes. Click Install again to install the operator.
Next, install OpenShift Serverless. Once again, select OperatorHub and then search for OpenShift Serverless. Click Install and on the subsequent page, select the channel matching your version of OpenShift and then click Install.
Once the operator has been installed, one additional step needs to be completed. Recall that Knative features several subprojects: serving and evening. By default, when the operator is deployed, both subprojects are not installed. Given that only Knative eventing will be used in this scenario, it will be the only subproject that will be installed. Under the OperatorHub section of the left hand navigation pane, select Installed Operators. At the top of the page, you will see a dropdown indicating the name of the current OpenShift project that you are in. Select the dropdown and select knative-eventing. Even though the subproject is not installed, OperatorHub will still create the project at deployment time.
With the Installed Operators page still loaded, select the OpenShift Serverless. On the operator page, select the Knative Eventing tab. Click the Create Knative button and then click Create. The OpenShift Serverless operator will then go ahead and deploy and configure Knative Eventing into the cluster.
With the necessary cluster prerequisites complete, clone the git repository containing the OpenShift manifests as they will be referenced in each of the following sections:
git clone https://github.com/sabre1041/image-trigger-tekton
cd image-trigger-tekton
Next, create a new namespace called image-watcher where we will be able to deploy our resources:
GitOps, the process for declaring the state of resources in a Git repository, has become synonymous with managing Kubernetes, and one of the most popular GitOps tools is Argo CD. The ability to drastically reduce the time and effort required to manage cluster configuration and associated applications has further accelerated the adoption of Kubernetes. However, as Kubernetes becomes more commonplace, there becomes a need to segregate the levels of access granted to users and tools to enable the proliferation of the technology.
In many enterprise organizations and managed services offerings, multi-tenancy is the norm and access is restricted for the types of operations that can be performed. This poses a challenge for Argo CD, which by default, manages resources at a cluster scope, meaning that it will attempt to perform operations across all namespaces, effectively breaking multi-tenancy. Contributors to the Argo CD project realized this concern early on and actually added support for namespace isolation back in version 1.4. Unfortunately, the namespace isolation feature in Argo CD is poorly documented, with most end users being unaware of such functionality. This article will illustrate the namespace isolation feature of Argo CD, how it can be used, as well as some of the limitations that currently exist.
Argo CD can be deployed to a Kubernetes environments in several ways:
The only method that currently supports namespace isolation is through the use of raw manifests and a separate manifest for namespace isolation has been included with each Argo CD release since version 1.4 (You can find the manifests on the releases page of Argo CD. The name of the file is called namespace-install.yaml instead of install.yaml for both the standard and highly available deployment).
The typical deployment of Argo CD creates two ClusterRoles:
Argo CD server – to provide the necessary level of access for resources that are made available through the browser, such as viewing logs from pods or events within namespaces.
Argo CD application controller – Full, unrestricted access to manage resources in a cluster as declared by the manifests from the Git repository
Any unprivileged user would be unable to successfully apply these resources which required the creation of a separate set of manifests. When using the set of manifests that supports namespace isolation, instead of ClusterRoles being created at a cluster scope, Roles and associated RoleBindings are created in the namespace where Argo CD is deployed. In addition, the Argo CD controller is granted only a limited number of resources instead of full access. The process for which Argo CD can apply and manage the resources that are declared in Git repositories will be described later on.
Deploying Argo CD in Namespace Isolation Mode
To demonstrate how the namespace isolation feature of Argo CD can be used, an OpenShift Container Platform environment will be used (any Kubernetes environment will work, however there are several considerations that need to be made when running in OpenShift).
First, obtain access to an OpenShift environment and create a new project called argocd which will be where the set of Argo CD resources will be deployed:
For this demonstration, version 1.7.8 was used. Feel free to replace with a version of your choosing.
After applying the manifests, the resources will be deployed. You may notice that the Deployment for Redis will not be running. As of version 1.7, the Redis deployment has considerations for ensuring that the container does not run as the root user. The configuration in the pod securityContext conflicts with the standard security mechanisms employed in OpenShift through the use of Security Context Constraints (SCC’s). Given that OpenShift already enforces that all pods by default run with a non-root user using a randomly generated ID, the value in the securityContext field can be safely removed.
Execute the following command to patch the deployment to remove the field from the Deployment:
The hostname for the route created can be found by executing the following command:
$ oc get route argocd -o jsonpath='{ .spec.host }'
Argo CD supports several methods for securing access to the server, including SSO. The most straightforward is to use the out of the box integrated authentication provider. By default, the password of the admin password is set as the name of the pod the first time the Argo CD server starts
The Argo CD CLI can be used to change the admin password so that if the server pod restarts, the password will not be lost.
Login to the Argo CD CLI:
$ argocd --insecure --grpc-web login "$(oc get routes argocd -o jsonpath='{ .spec.host }')":443 --username "admin" --password "$(oc get pod -l app.kubernetes.io/name=argocd-server -o jsonpath='{.items[*].metadata.name}')"
Set the admin password for Argo CD to be “password” by executing the following command
$ argocd account update-password --current-password=$(oc get pod -l app.kubernetes.io/name=argocd-server -o jsonpath='{.items[*].metadata.name}') --new-password=password
With the default password changed, launch a web browser and navigate to the url of the route discovered previously. Enter the admin username and password to access the console.
Namespace Isolation
Clusters define the Kubernetes environments for which resources will be deployed to. A cluster can be either the environment Argo CD is deployed on or a remote instance. When Argo CD is first deployed, a single local cluster is created called in-cluster which references the local environment for Which Argo CD is running on and communicates against the internal Kubernetes service (https://kubernetes.default.svc). If we were to create an application that attempted to manipulate cluster level resources, the process would fail as the Argo CD does not have the necessary permissions. As described previously, Argo CD uses the argocd-application-controller service account to manage resources and this service account has a ClusterRoleBinding against a ClusterRole with unrestricted permissions. In a namespace deployment of Argo CD, this level of permission does not exist and the service account is only granted a limited level of access to manage Argo CD related resources and internal functions.
For Argo CD to be able to function as desired, access to namespaces must be explicitly granted. This process requires the use of the Argo CD CLI and the argocd cluster add subcommand to specify the namespaces that should be granted access to manage.
Create a namespace called argocd-managed for which we will be able to test against
The --skip-config-write option was specified to avoid changing into the newly created project since the majority of our actions will remain in the argocd project.
To grant Argo CD access to manage resources in the argocd-managed project, add a new cluster called “argocd-managed” using the following command:
You may have noticed a few interesting options in the above
--name – Friendly name of the cluster --in-cluster – Specifies that the internal Kubernetes service should be used to communicate with the OpenShift API. --system-namespace – Configurations for clusters managed by Argo CD are typically written to a secret in the kube-system namespace. As the kube-system namespace requires elevated access, the argocd namespace for which Argo CD is deployed within will be used instead --namespace – Namespace that Argo CD should be granted access to manage. Multiple iterations of the namespaces parameter can be specified in the argocd cluster add command to manage multiple namespaces.
The command will then return the following result.
INFO[0002] ServiceAccount "argocd-manager" created in namespace "argocd"
INFO[0002] Role "argocd-managed/argocd-manager-role" created
INFO[0003] RoleBinding "argocd-managed/argocd-manager-role-binding" created
Cluster 'https://kubernetes.default.svc' added
A new service account called argocd-manager is created in the argocd namespace along with a role and rolebinding in the targeted namespace that grants the argocd-manager service account unrestricted privileges.
The details for the cluster are written in a secret in the argocd</code namespace and contain the following key properties:
name – Friendly name for the cluster
server – Hostname for the cluster
config – json data structure describing how to communicate with the cluster
The bearerToken that is defined in the cluster config is associated with the newly created argocd-manager service account which was granted access in the argocd-managed namespace. The namespaces field is a comma separated list of namespaces that Argo CD can manage resources against .
Let’s demonstrate that Argo CD can be used to deploy resources against the argocd-managed namespace and validate namespace isolation.
Using the Argo CD CLI, create a new application called nexus to deploy a Sonatype Nexus instance:
You can verify the application in the Argo CD web console using the route, username and password that was previously created.
By selecting the nexus application, you will be presented with a depiction similar to the following indicating Argo CD was successfully configured for namespace isolation:
Note: You may ignore the “OutOfSync” message as it is indicating that the live OpenShift Route for Nexus within the cluster contains differences than the manifest declared. These types of situations are managed through the use of customizing the differences.
Validating Namespace Isolation Enforcement
The enforcement of namespace isolation can be validated using multiple approaches. First, Argo CD will forbid the management of resources in a cluster that is not specified by a value present in the namespaces field of the cluster configuration when configured in namespace isolation mode. Otherwise, standard Kubernetes RBAC will forbid the argocd-application-controller service account from managing resources in a namespace it cannot access.
Let’s validate this assessment by creating a new namespace called argocd-not-managed and attempt to deploy the same nexus application.
Verify the application was not successfully deployed either in the ArgoCD web console or using the command line by executing the following command:
$ argocd app get nexus-not-managed

Name: nexus-not-managed
Project: default
Server: https://kubernetes.default.svc
Namespace: argocd-not-managed
Repo: https://github.com/redhat-canada-gitops/catalog
Target:
Path: nexus2/base
SyncWindow: Sync Allowed
Sync Policy: Automated
Sync Status: Unknown (5978975)
Health Status: Missing

CONDITION MESSAGE LAST TRANSITION
ComparisonError Namespace "argocd-not-managed" for Service "nexus" is not managed 2020-11-15 23:12:28 -0600 CST

GROUP KIND NAMESPACE NAME STATUS HEALTH HOOK MESSAGE
PersistentVolumeClaim argocd-not-managed nexus Unknown Missing
Service argocd-not-managed nexus Unknown Missing
apps.openshift.io DeploymentConfig argocd-not-managed nexus Unknown Missing
image.openshift.io ImageStream argocd-not-managed nexus Unknown Missing
route.openshift.io Route argocd-not-managed nexus Unknown Missing
Notice how under the condition, it explains that the application cannot be deployed to the argocd-not-managed namespace as it is not managed in this cluster, thus validating namespace isolation is functioning as expected.
Namespace Isolation Automation
The primary goal of Argo CD is to apply resources that are expressed in a declarative manner. The Argo CD server itself embraces declarative configuration through the use of Custom Resource Definitions, Secrets and ConfigMaps and given that the argocd cluster add command creates a series of resources itself, we can avoid having to use the Argo CD CLI to manage cluster configuration by being able to specify them in a declarative fashion.
Let’s automate the steps that the argocd cluster add command performs. Recall, the command added a Service Account, Role, RoleBinding and Secret.
Note: It is best to have a fresh environment of Argo CD available to work through these steps. To reuse the existing environment, execute the following command which should reset the environment to a semi-clean state.
Finally, the cluster secret can be created. Execute the following command to create the secret which will contain the bearer token for the argocd-manager service account and the namespace that the cluster will manage (among a few others).
Notice how the secret created above contains the label argocd.argoproj.io/secret-type: cluster. Any secret with this label will be interpreted by Argo CD as a cluster secret.
At this point, Argo CD has been set up in the same manner as the CLI. This type of configuration affords greater flexibility and avoids needing to use the Argo CD CLI to perform common and repeatable configurations. Feel free to repeat the application creation and deployment as described previously to confirm a successful synchronization of resources into the cluster.
Additional Forms of Restricting Access
Aside from using namespaces and clusters to limit access to where resources can be deployed, Argo CD does have other constructs available for supporting multi-tenancy. Projects allow for a logical grouping of applications and policies within Argo CD and can either supplement or act as a replacement for the namespace isolation feature.
For example, there may be a need for a single Argo CD instance to be deployed with access to manage cluster level resources instead of separate instances, but still provide some form of isolation between teams. By using a combination of Argo CD projects and RBAC, this can be achieved.
Projects provide the capability to limit the source repositories containing content (Git), the clusters resources can be deployed to, the namespaces, and the types of resources that can be deployed in a whitelist/blacklist fashion, both at a cluster and namespace scope. Finally, RBAC policies through the use of group association can be applied to determine the rights that users have against projects.
While projects do provide a finer grained access mode and configuration model, it does require additional work in order to achieve the desired rights granted to users. Since Argo CD is deployed with rights to manage resources at a cluster level, it is imperative that proper considerations be made in order to protect the integrity of the cluster as well as to restrict the level of access that can be achieved by various tenants.
Limitations of Argo CD Namespace Isolation
While the namespace isolation feature in Argo CD does provide a path towards supporting true multi-tenancy, there are still additional hurdles that must be overcome (as of version 1.7.8) before it can be achieved. An Argo CD cluster configuration provides a method for specifying the Kubernetes cluster URL, credentials that can be used to communicate with the cluster, as well as the namespaces that resources can be deployed to. However, regardless of the number cluster configurations made against a single cluster, only one can be active at a time. This gap limits being able to use the namespace isolation feature to provide access to a namespaced scoped deployment of Argo CD and provide two separate teams that manage different namespaces the ability to easily manage their own set of resources without the knowledge of each other.
The other limitation, as described near the beginning of the article is the lack of documentation around the support for namespace isolation. It may be possible that you, the reader, are learning about this feature. If there was more awareness of this type of functionality, existing issues could be resolved and new features could be developed to expand the potential capabilities.
The creators and community surrounding Argo CD realize that multi-tenant support is important for broader adoption of the tool into enterprise organizations and those with a high security posture. The namespace isolation feature is a great first step, but additional work still needs to be achieved. For now, the recommended approach is to deploy separate namespace scoped instances of Argo CD for teams that do not require access to cluster scoped resources and are looking to leverage a specific set of namespaces. Fortunately, given that Argo CD emphasizes declarative configuration, the implementation can be easily achieved.
One of the methodologies of cloud native architectures is to externalize applications configurations and store them within the environment. OpenShift provides multiple mechanisms for storing configurations within the platform, which include the use of Secrets and ConfigMaps. These resources can then be exposed to applications as either environment variables or as file system volumes mounted within pods and containers. By default, volume mounts uses the standard operating system mount command to inject the external content into the container. While this implementation works well for the majority of use cases, there are situations where there is a desire to retain the contents of the existing directory and only inject a specific file instead of an entire directory. Fortunately, OpenShift and Kubernetes have a solution for this challenge using the subPath property of the container volumeMount for which this discussion will highlight.
To demonstrate how one can utilize subPath volume mounting, let’s deploy an application that can benefit from this feature. Applications commonly consume configuration files within dedicated directories, such as a conf or conf.d. One such application that leverages this paradigm is the Apache HTTP Server, better known as httpd. A variety of configuration files are spread across these two directories within the /etc/httpd folder. If custom configuration files were injected using a typical volume mount to one of these locations, key assets the application server had been expecting to find may not be available. The conf.d directory is the common location for user defined configurations. For example, one can specify that all requests that are made to specific context paths are automatically redirected to another location as shown below:
In the example above, requests to the /redhat context path are redirected to https://www.redhat.com while requests made against the /openshift context path are redirected to https://www.openshift.com. While one could configure this file to be placed in this directory at image build time, there may be a desire to customize the contents per deployed environment. This is where externalizing the configuration outside the image and injecting the contents at runtime becomes valuable. Given that this file does not contain any sensitive data, it is ideal to be stored in a ConfigMap. First, create a new file on the local file system called subpath-redirect.conf with the contents from the example above.
Now, lets use an OpenShift environment to demonstrate this use case. Login and create a new project called subpath-example:
oc new-project subpath-example
By default, OpenShift provides a ImageStream containing an Apache HTTPD server which can be deployed with a single command. Execute the following to create a new application called subpath-example:
A new deployment of the httpd image will be initiated. When the new-app command is used against an ImageStream, no route to expose the application outside the cluster is created. Execute the following command to expose the service to allow for ingress traffic.
oc expose svc httpd
Locate the hostname of the application by executing the following command:
oc get route subpath-example -–template=’{{ .spec.host }}’
Copy the resulting location into a web browser which should display the default Apache welcome page.
Now, lets use the contents of the subpath-redirect.conf file previously create a new ConfigMap that can then be injected into the application.
Before mounting the ConfigMap, explore the running application by starting a remote shell session into the running container.
First, confirm the container is running by locating the name of the running pod:
oc get pods
Start the remote shell session:
oc rsh <pod_name>
List the files in the /etc/httpd/conf.d directory:
ls –l /etc/httpd/conf.d

-rwxrwxrwx. 1 root       root        366 Nov  7 12:26 README
-rwxrwxrwx. 1 root       root         63 Jan  8  2018 auth_mellon.conf
-rwxrwxrwx. 1 root       root       2966 Nov  7 12:25 autoindex.conf
-rwxrwxrwx. 1 1000150000 root       9410 Feb 14 06:33 ssl.conf
-rwxrwxrwx. 1 root       root       1252 Nov  7 12:21 userdir.conf
-rwxrwxrwx. 1 root       root        556 Nov  7 12:21 welcome.conf
As demonstrated by the above output, there are a number of user defined configurations already present within the httpd image (inside the conf.d directory) and overwriting these files by a standard volume mount could cause the container to fail to operate.
Define a new volume in the pod referencing the ConfigMap containing the contents of the Apache HTTPD configuration file along with a volumeMount to the /etc/httpd/conf.d by editing the httpd DeploymentConfig by executing oc edit dc subpath-example.
Notice how the subPath property of the volumeMount specifies the name of the file in within the ConfigMap (oc describe configmap subpath-example would display this name as well) along with the full mountPath to the file that will be created in the Apache configuration directory.
Save the changes which will trigger a new deployment of the application
Running oc get pods again will confirm that the new version of the application has been deployed.
Once again, obtain a remote shell to the running pod using the steps previously described.
List the files in the /etc/httpd/conf.d and notice the presence of the subpath-redirect.conf file from the ConfigMap:
-rwxrwxrwx. 1 root       root        366 Nov  7 12:26 README
-rwxrwxrwx. 1 root       root         63 Jan  8  2018 auth_mellon.conf
-rwxrwxrwx. 1 root       root       2966 Nov  7 12:25 autoindex.conf
-rwxrwxrwx. 1 1000150000 root       9410 Feb 14 06:33 ssl.conf
-rw-r--r--. 1 root       1000150000  150 Feb 14 06:33 subpath-reverse.conf
-rwxrwxrwx. 1 root       root       1252 Nov  7 12:21 userdir.conf
-rwxrwxrwx. 1 root       root        556 Nov  7 12:21 welcome.conf
Confirm the configuration has been applied to the application by navigating to the /redhat context of the application in your browser. If successful, you should be redirected to https://www.redhat.com. In addition, navigating to the /openshift context will redirect to https://www.openshift.com.
The ability to inject individual files from externally stored resources within the platform using the subPath feature of volumes expands and accelerates the delivery of applications to achieve greater business value.


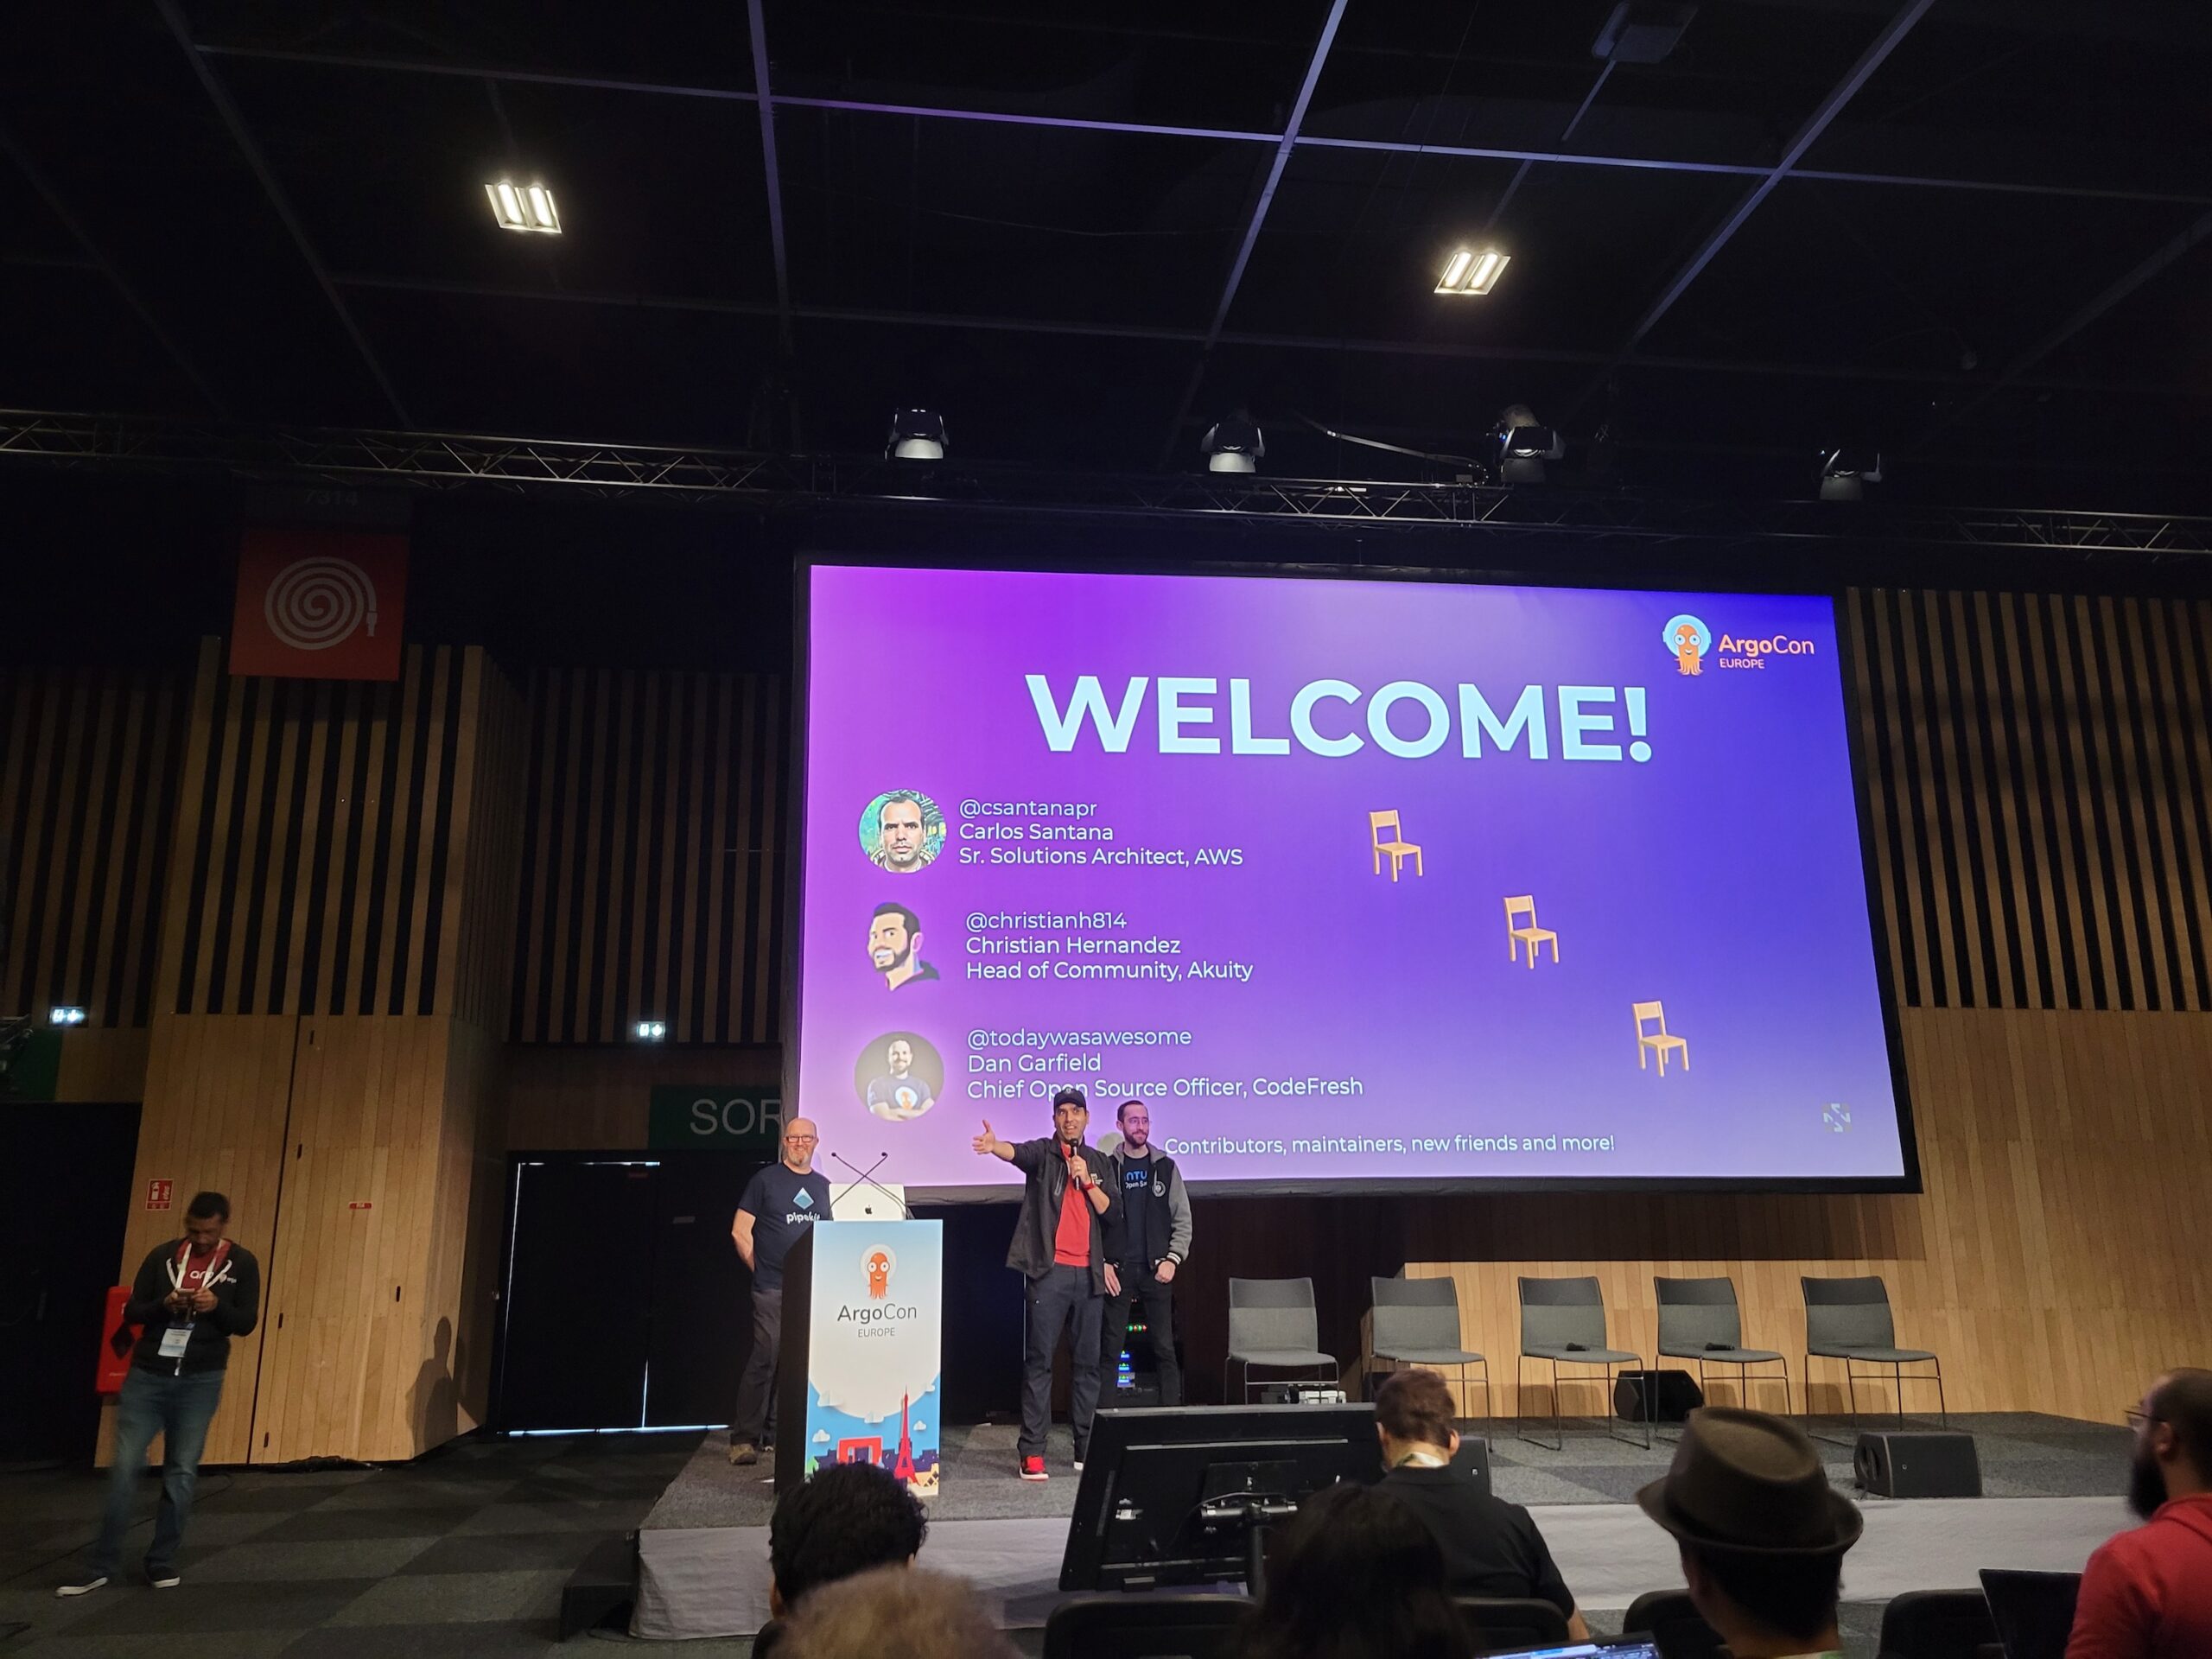

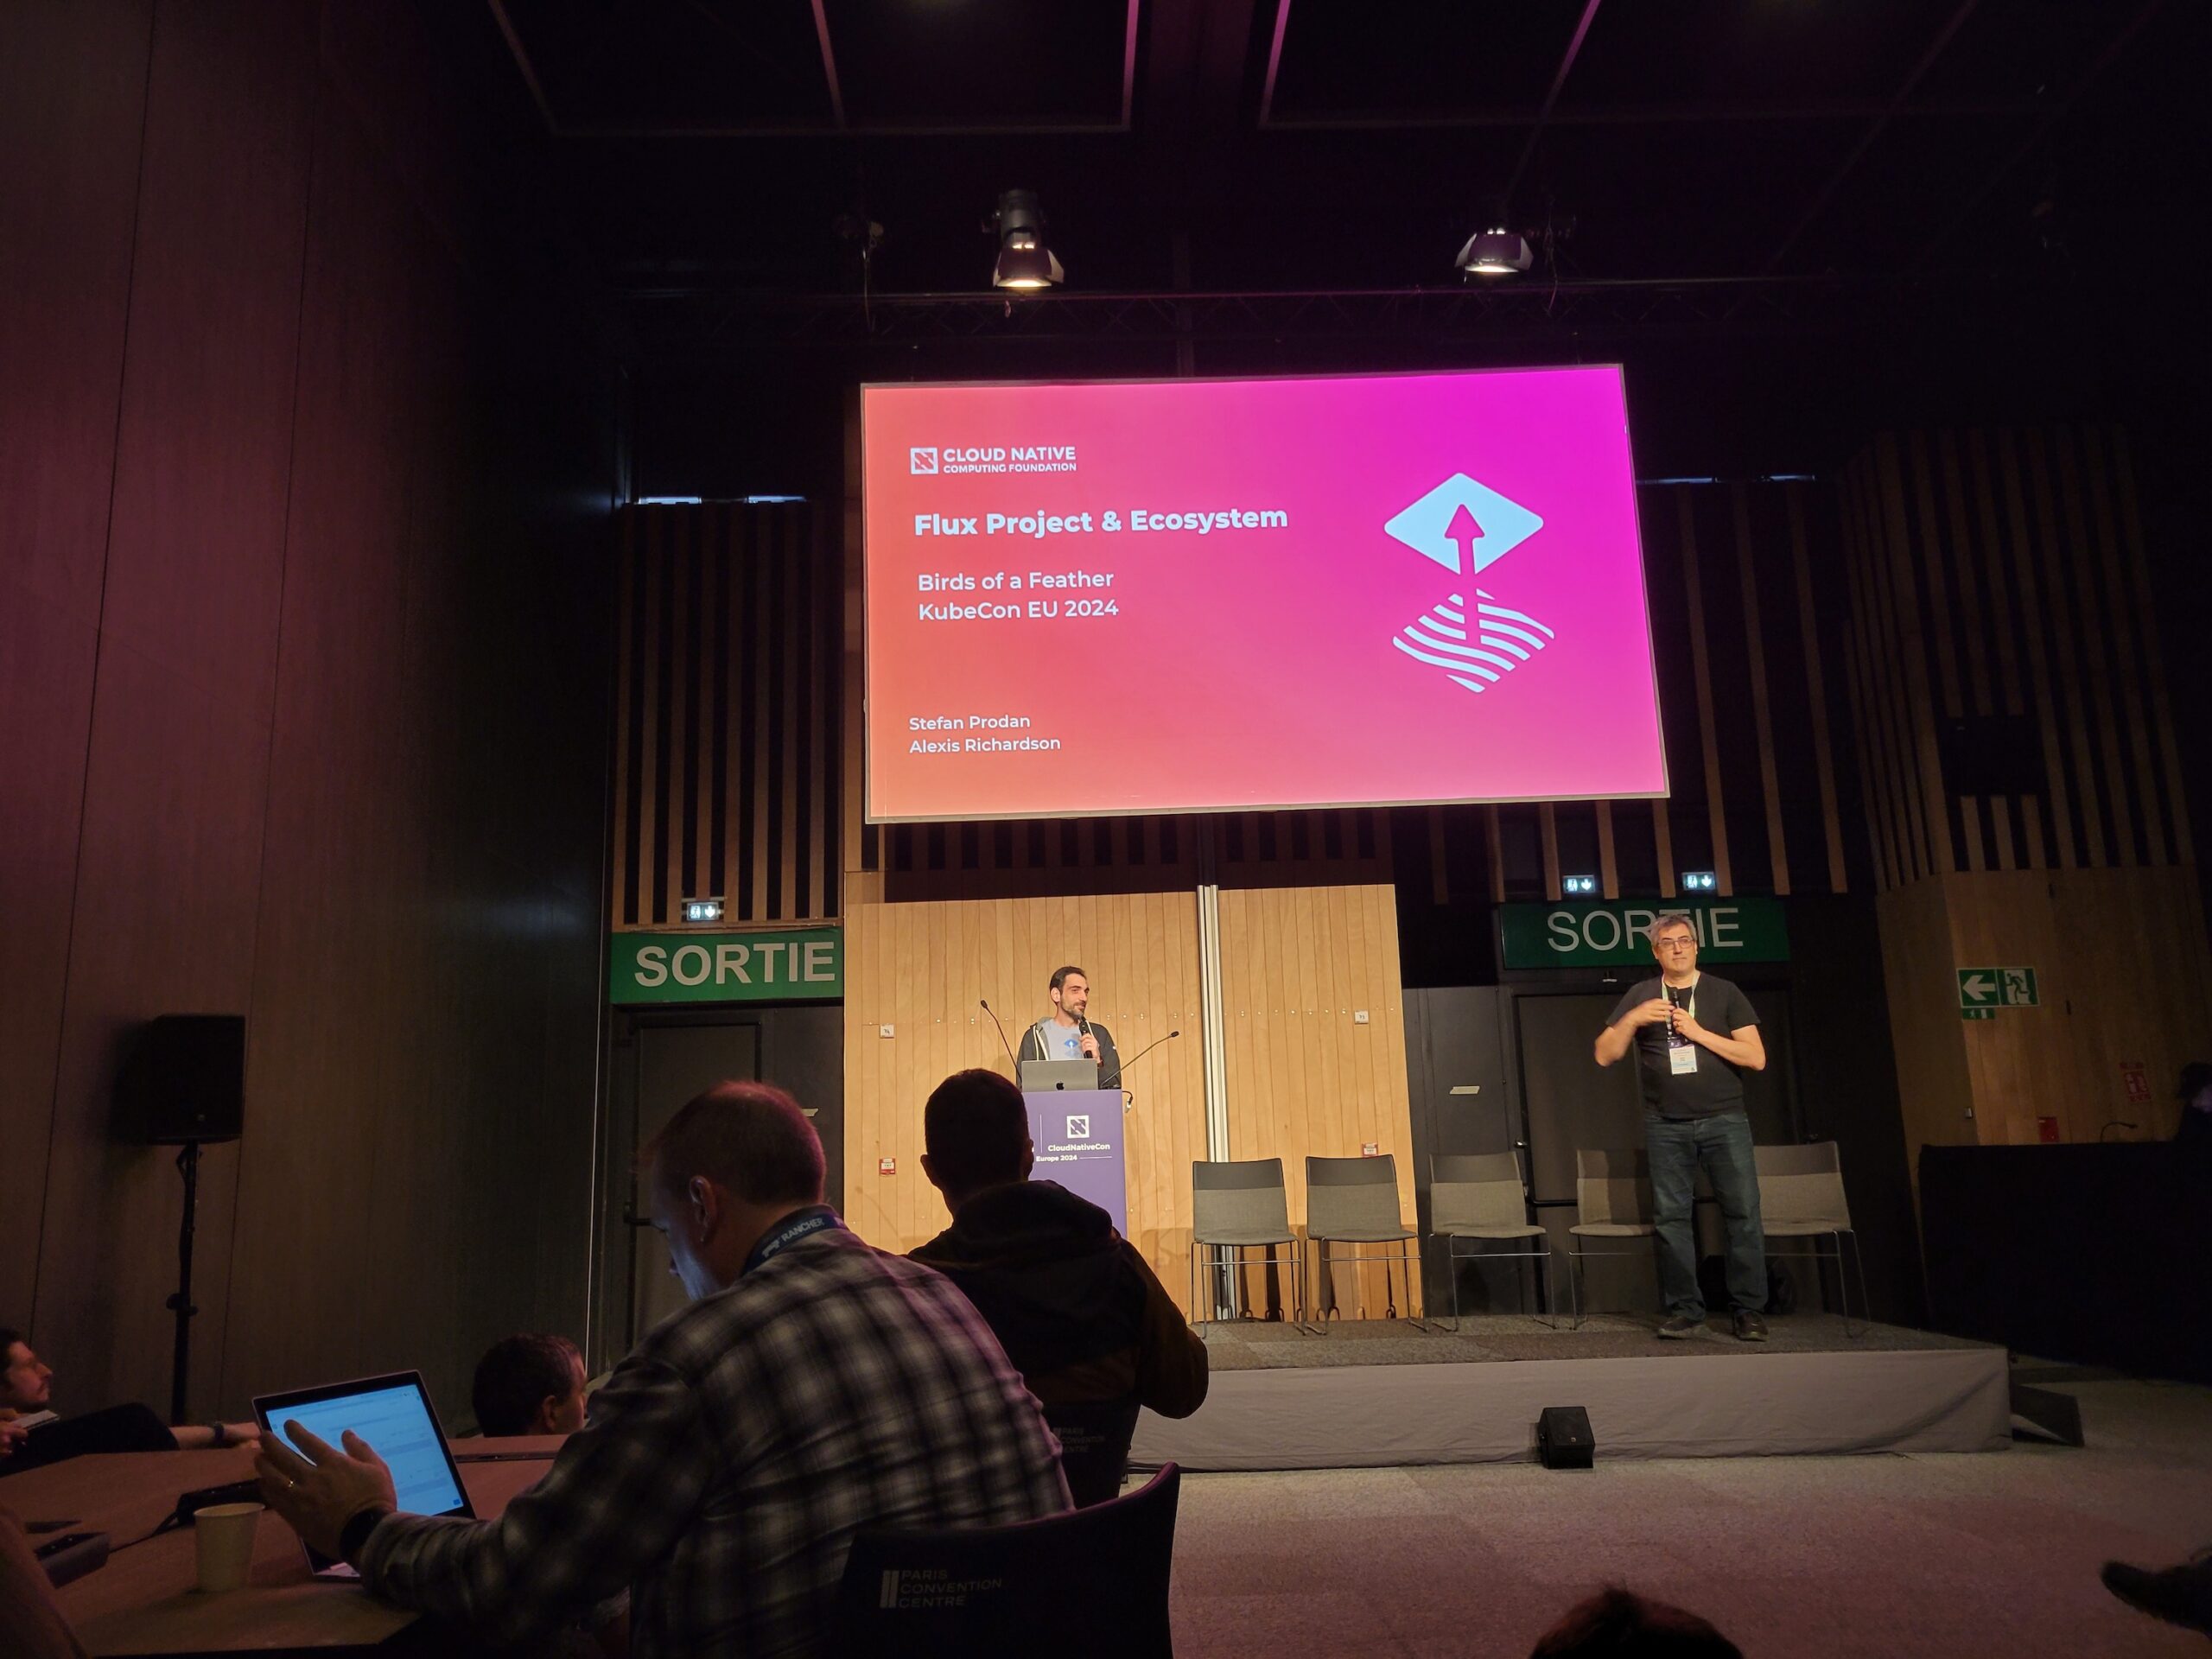
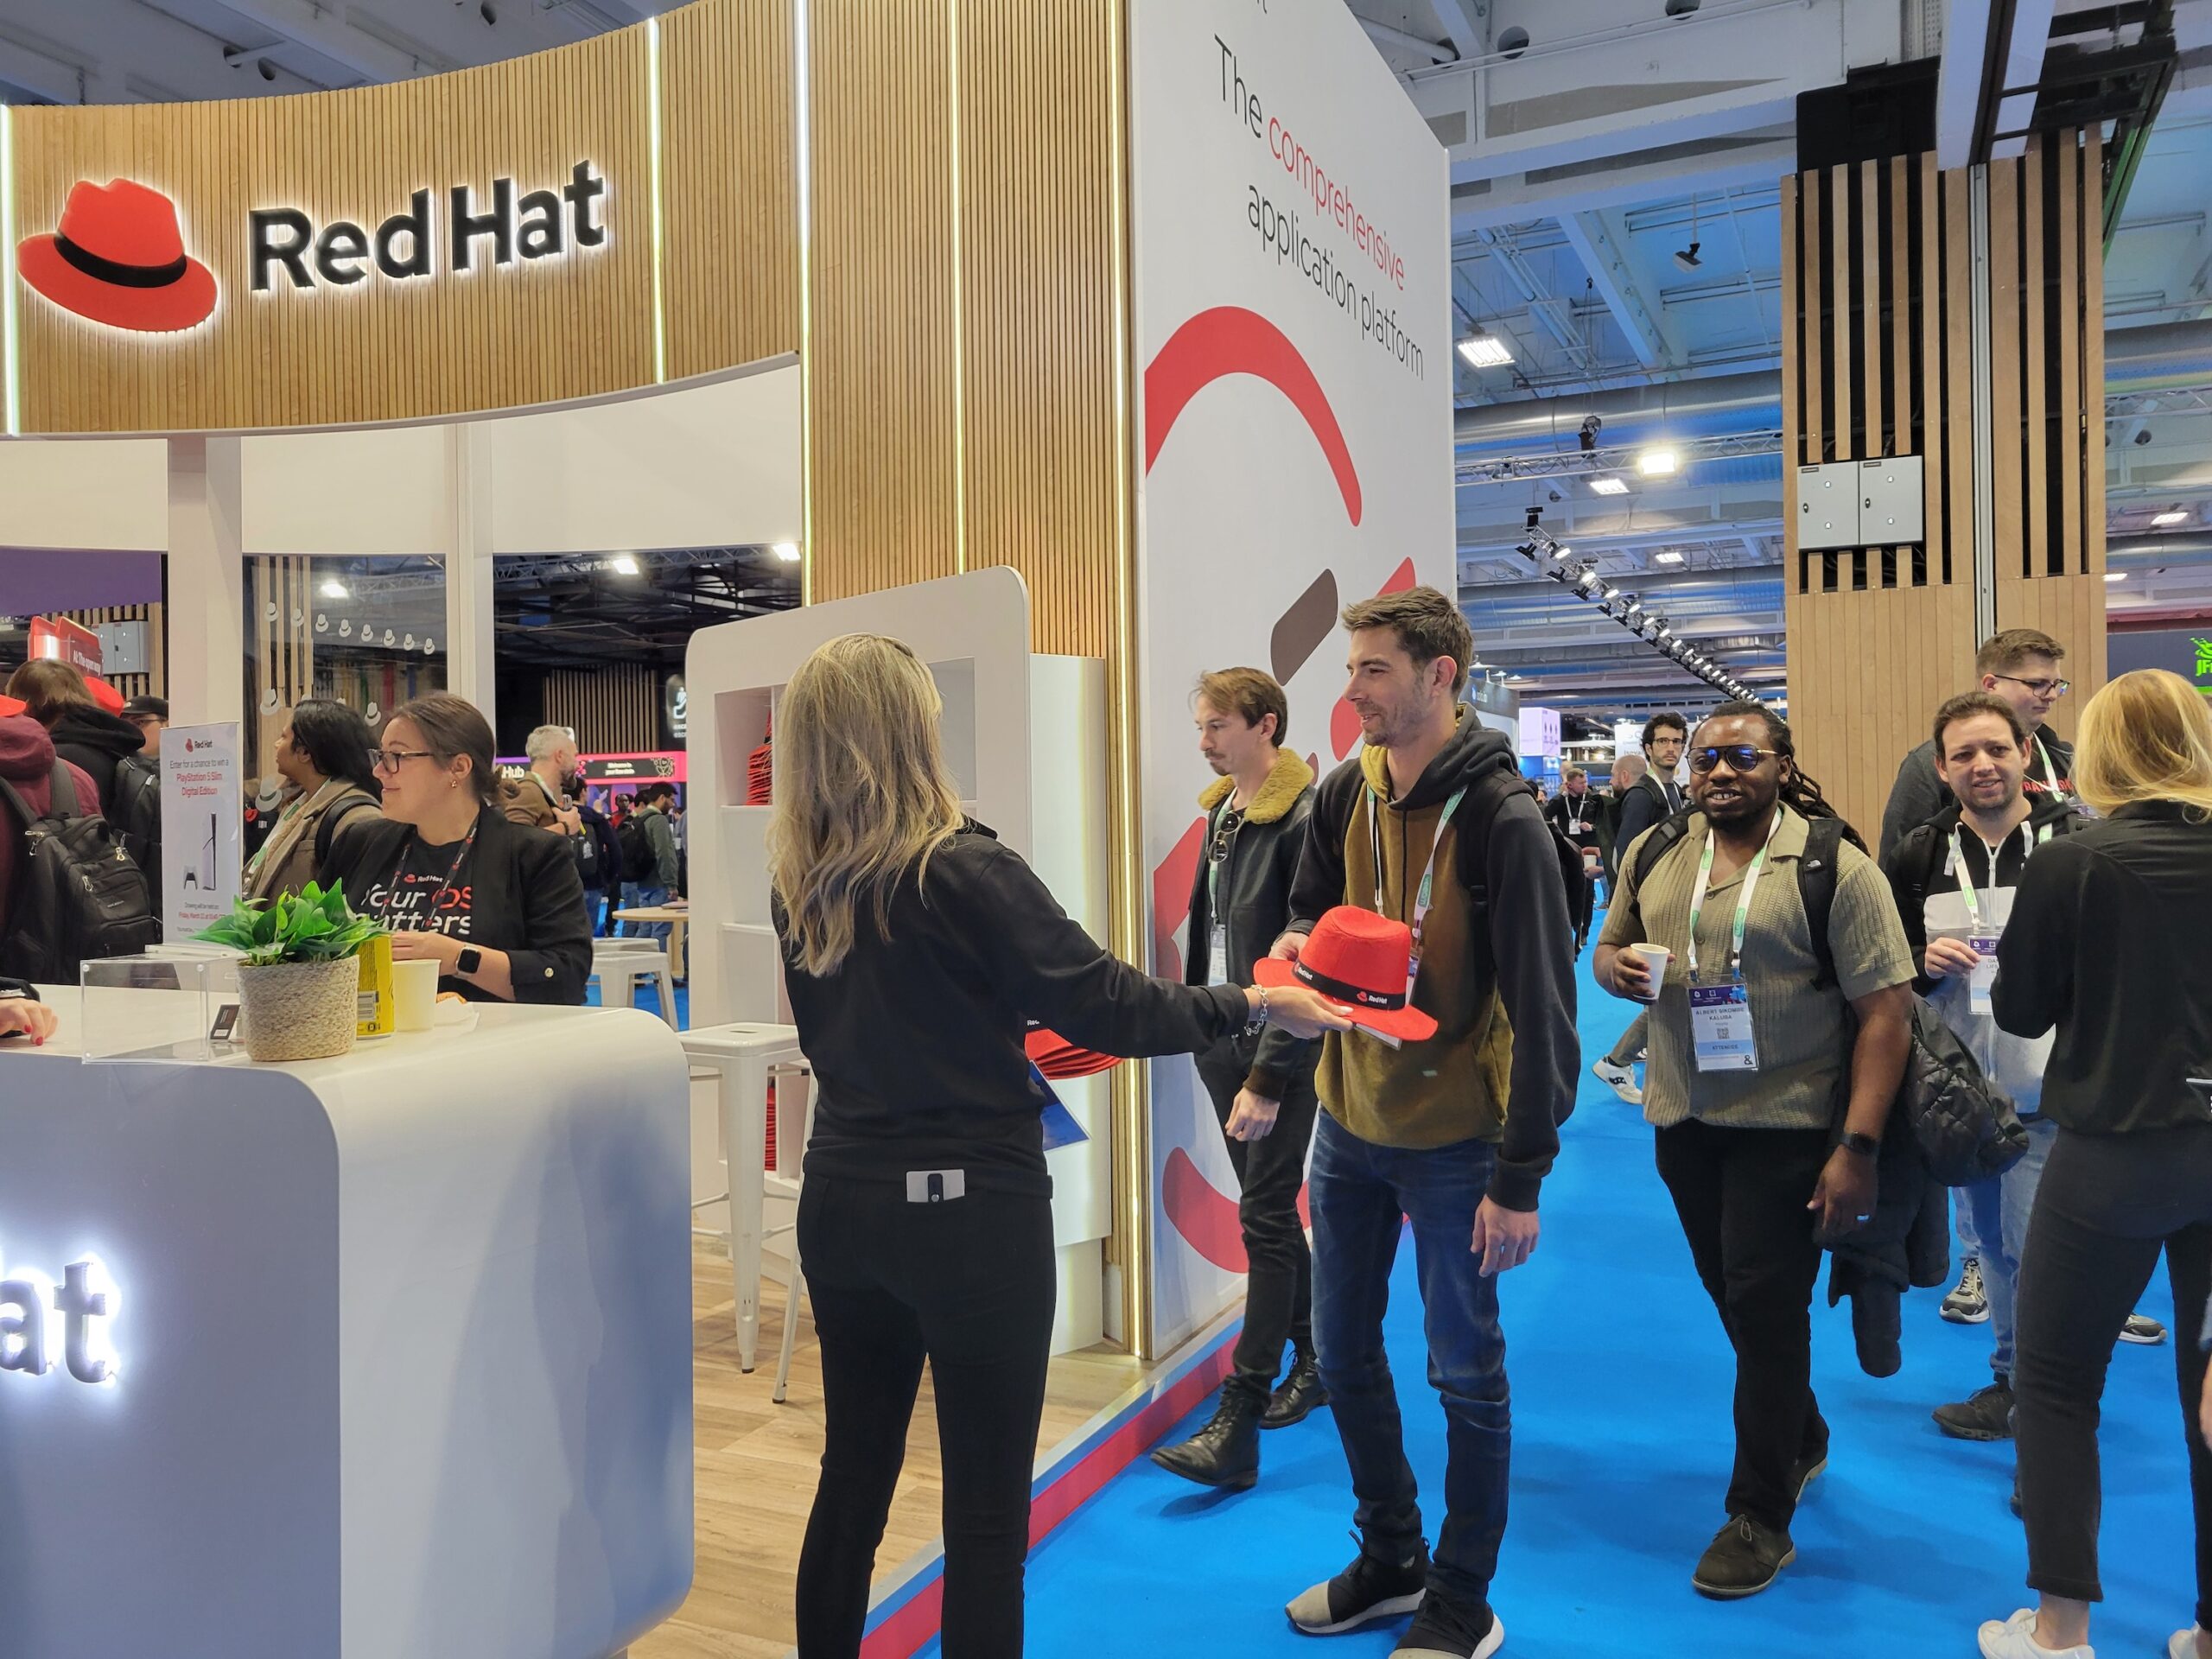
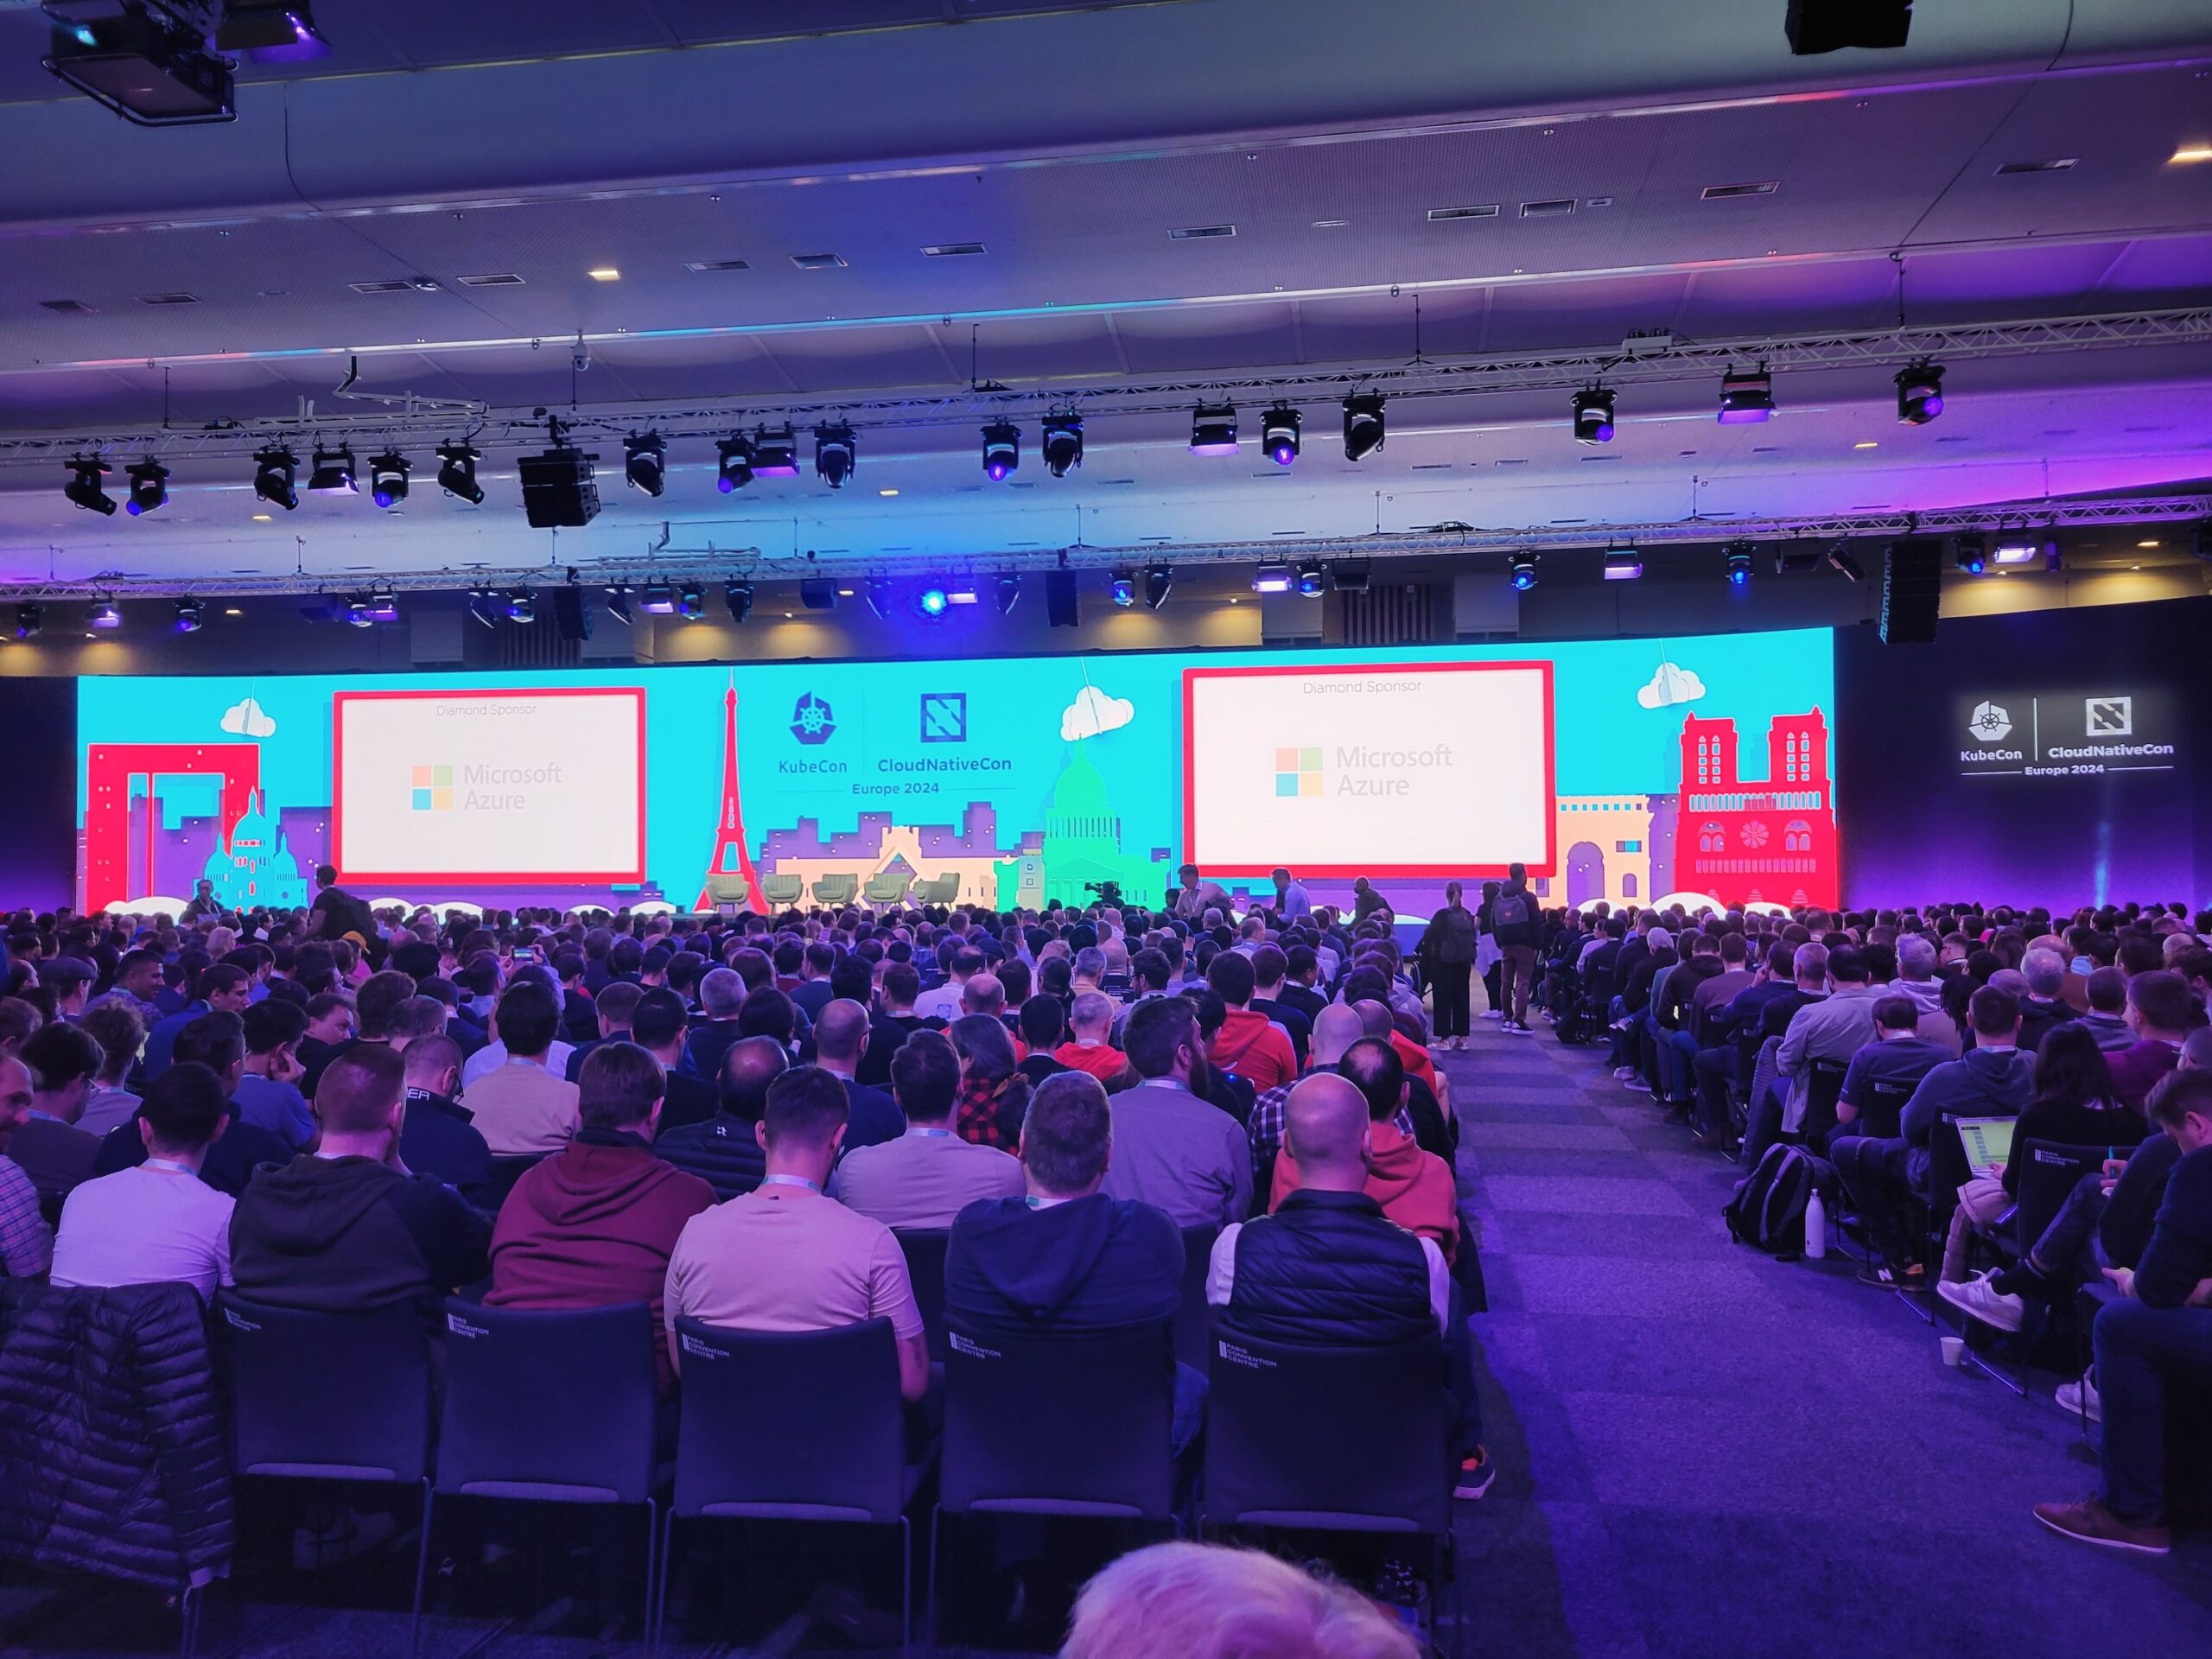

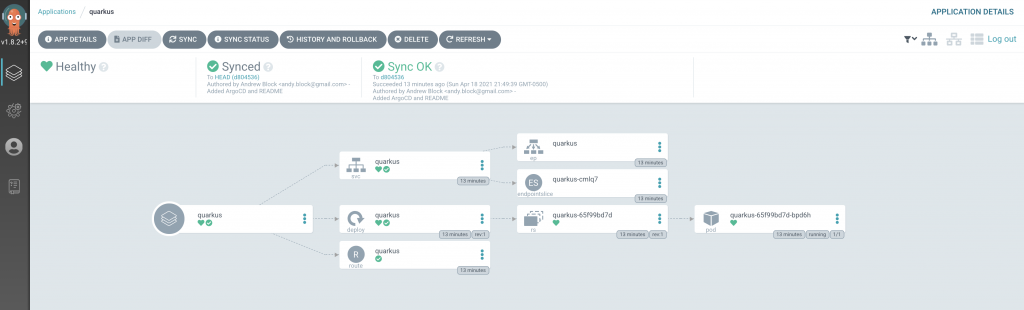


Recent Comments