Posted: February 10th, 2014 | Author: sabre1041 | Filed under: Technology | Tags: Camel, OpenShift | 3 Comments »
Since its creation in 2007, the Apache Camel project has allowed developers to integrate systems by creating Service Oriented Architecture (SOA) applications using industry standard Enterprise Integration Patterns (EIP). At its core, Camel is a routing engine builder for which messages can be received and processed. The processing of messages uses a standardized API library backed by an extensive collection of components which abstracts the actual implementation of routing and transformation of messages. These components also include the ability to communicate with external systems through an array of protocols ranging from web services, REST and JMS. With more than 80 components in the standard Camel distribution, developers have the flexibility to perform power operations with minimal effort to suit their business needs. One of the benefits of the Camel component framework is that it was designed as a factory system where new components can be easily added to solve a business use case.
As more companies and individuals look to migrate their operations and applications into cloud-based solutions, the management of these resources can prove to be a challenge. The overall architecture may be different than what many individuals are accustomed. The OpenShift Platform as a Service (PaaS) is one such cloud offering where developers can quickly create powerful scaled applications without having to worry about managing infrastructure or complex software installation.
Introducing the OpenShift Camel Component
Imagine being able to communicate with the OpenShift Platform directly through a Camel route? With the OpenShift Camel component, it is now possible. Exposed through an Endpoint as both a Camel Consumer and Producer, OpenShift resource details can be retrieved or modified all within a Camel route. Want to find out information about a particular OpenShift Domain, such as the applications and their details? How about automating application deployments? These are only some of the possibilities now available.
Communication between the OpenShift Camel component and OpenShift is facilitated by using the REST API exposed by the OpenShift platform and the OpenShift Java Client. Responses from the OpenShift Camel component will be returned using the API from the OpenShift Java Client.
Using the OpenShift Camel Component in your project
The OpenShift Camel Component can be easily added to a new or existing project. The following steps will describe how this can be accomplished.
GitHub Project: https://github.com/sabre1041/camel-openshift
- Fork/Clone the GitHub repository
git clone https://github.com/sabre1041/camel-openshift.git
- Build the project using Maven
mvn clean install
- Add the component to a new or existing Camel Project as a Maven dependency in the projects’ POM file.
<dependency>
    <groupId>org.apache.camel</groupId>
    <artifactId>camel-openshift</artifactId>
    <version>0.0.1-SNAPSHOT</version>
</dependency>
- The following example implementation will retrieve information about the authenticated user and print out their user details to the log:Java DSL
import org.apache.camel.builder.RouteBuilder;

public class PrintOpenShiftUserRoute extends RouteBuilder {

    public void configure() throws Exception {
        // Retrieve User Details
        from("openshift://user?userName=<openshift_username>&password=<openshift_password>")
            //Print to Log
            .log("${body}");
    }

}
Spring XML
<route>
<description>Spring XML Route. Full XML omitted for brevity</description>
<from uri="openshift://user?userName=<openshift_user>&password=<openshift_password>"/>
<log message="${body}"/>
</route>
With the steps above complete, the project can be deployed to a running container or unit tests can be created to verify the expected results. Additional functionality including how to leverage Authentication as Message Headers can be found on the GitHub project page.
In an upcoming post, I will demonstrate several uses for the OpenShift Camel including how the component can be leveraged within a SwitchYard application.
Posted: November 16th, 2013 | Author: sabre1041 | Filed under: Technology | Tags: OpenShift | No Comments »
 Deploying an application to the OpenShift Platform as a Service (PaaS) can be accomplished in only a matter of minutes due to the wide array of tools available to the developer. One of the tools provided by OpenShift is the ability to add the Jenkins Continuous Integration server to the development lifecycle of an application. The inclusion of Jenkins affords several incentives for both developers and stakeholders of any development project. First, by adding Jenkins to an OpenShift application, the build process is delegated to Jenkins resulting in far less downtime for the application as typically the application is taken offline during the build and deployment process. Secondly, it brings in the Jenkins Continuous Integration server, with its wide array of plugins and large community support, into your environment. Jenkins is one of the components that make up a continuous integration environment which is a set of software tools responsible for the assembly and distribution of software artifacts. The primary components of this environment consist of a build process, version control system, continuous integration server and finally a repository manager. The OpenShift ecosystem contains the majority of the components with an exception of not being able to easily access and store artifacts that have been assembled as a result of a build process. This process is typically delegated to the final component of the continuous integration environment: the repository manager. One of the more popular repository managers available on the market today is Sonatype Nexus. Nexus can serve multiple purposes in an environment as it can be a central location for binary artifacts and their dependencies, act as a proxy between your organization and publically available repositories, and serve as a deployment destination for internally created artifacts.
Each component of an OpenShift application, whether it is a web or database server framework, is known as a cartridge and there are wide number of cartridges readily available today. One of the benefits of the OpenShift cartridge system is the ability to leverage downloadable user cartridges to extend the base set of included cartridges. By offering Nexus as a downloadable cartridge, it would allow for the completion of creating a continuous integration environment in the cloud. To learn more about a continuous integration environment and how to build one of your own, refer to the following link: http://www.redhat.com/resourcelibrary/whitepapers/eap-create-compile-and-deployment-environment
The Nexus cartridge project is hosted both on GitHub and on OpenShft and built using the Cartridge Development Kit. By leveraging the CDK, an end user can choose the particular build of a cartridge to add to their application. The Nexus cartridge project is available at the following locations:
After selecting the CDK link above, you can use the OpenShift RHC Client tools or the web console to add the cartridge to an application based on the information provided. If you are using the client tools, you can use the command presented at the top of the page which represents the most recent build from the master branch of the project to create an application. When using the web console, first login and click Add Application. Downloadable cartridges can be added by entering the location of the cartridge manifest in the textbox provided in the “Code Anything” section. Click Next, enter the name for the newly created application using the Nexus cartridge, and click Create Application. After the cartridge has been created, you will be presented with a confirmation and the user name and password for the Nexus administrator account. After waiting a few moments to allow the server to come online, you can click the application link provided which will bring you to the Nexus server start page. More information on how to configure and utilize Nexus can be found at the following documentation page: http://books.sonatype.com/nexus-book/reference/
At this point, you have a fully functional repository manager hosted in the cloud. In an upcoming post, I will demonstrate how you can create a fully functional continuous integration environment hosted on the OpenShift platform.
Posted: April 11th, 2013 | Author: sabre1041 | Filed under: Technology | Tags: Errai, GWT, JBoss, OpenShift | No Comments »
One of the prominent features of Java EE 6 was the introduction of Contexts and Dependency Injection (JSR 299). Built on top of Dependency Injection for Java (JSR 330), CDI allowed Dependency Injection (DI) and Aspect Oriented Programming (AOP) to become standardized giving developers the flexibility to implement a native solution rather than having to utilize a third party library such as Spring. CDI makes it easy to inject resources such as managed beans and services. It has done wonders for server side components, but if there is one thing web 2.0 has taught us, more and more functionality is being leveraged on the client side. Java based web frameworks have also moved in this direction as well with implementations such as Google Web Toolkit (GWT) compiling Java code into highly optimized JavaScript. Until now, CDI was restricted to being a server side technology, but with the help of the Errai Framework, CDI can now be leveraged on the browser. Errai is more than a dependency injection toolkit but rather a set of technologies built on top of the ErraiBus messaging framework for developing rich web applications using GWT. In this post, we will demonstrate several components of the Errai framework and how they can be used to build powerful web applications.
To help illustrate the various components of the Errai framework, we will walk through a sample application. This application allows users to perform basic mathematic operations such as addition, subtraction, multiplication and division among others. After a successful submission, the result of the operation is displayed below along with a log of all of the operations they have previously performed. Also included next to each submission is an icon indicating the users’ operating system and browser.

This application was designed specifically for showcasing various Errai components. The source code for this application is found at https://github.com/sabre1041/errai-math which will be useful when we begin discussing the implementation. The application can also be accessed directly as it is deployed on Red Hat’s OpenShift PaaS by navigating to http://erraimath.andyserver.com. The application can be deployed using GWT development mode, JBoss EAP 6 or OpenShift. It utilizes the following Errai components:
- Errai JAX-RS
- Errai CDI
- Errai UI
- Errai Data Binding
We will discuss each component in detail moving forward.
Before we dive into the details of the application, let’s briefly discuss how Errai applications fit into the conventions of a GWT application. A GWT application is configured into Modules which are defined in xml files. These files are placed at the top of the project hierarchy. In our application, the module file is named ErraiMath.gwt.xml. Standalone GWT applications need to also define an EntryPoint class which denotes the starting point for the application in their module file. Errai applications can forgo this requirement by instead annotating a class with the @EntryPoint annotation. Our EntryPoint class is called ErraiMath in the com.redhat.errai.math.client.local package. All client side files will be placed in this package.
Posted: March 17th, 2013 | Author: sabre1041 | Filed under: Technology | Tags: OpenShift | No Comments »
Congratulations. From the estimated 200 million blogs on the internet today, you have found your way to this neck of the information superhighway. Before we delve into real business, lets take a step back to who I am. My name is Andrew Block and I live two things: technology and sports (hence the tagline at the top). While my two hometown teams, the Buffalo Sabres and Buffalo Bills, continue their path towards futility, I’ll go beyond the X’s and O’s to provide more than you would find on the front page of espn.com. While sports will be a frequent topic, it will not be the primary subject. Technology, ever increasing throughout our lives, will be the primary topic of discussion. The majority of posts will be how to’s and best practices on a particular piece of technology (yes, even including this post, but we will get to that later).
So, now that we got that little introduction out of the way. Let’s get down to business. The title of this post beyond the introduction is “how we got to this point”. How did we get to this point? Over the past few years, I have written and contributed to a number of technology best practice documents. However, most of these were internal documents. I came to the conclusion that others outside my organization would also find these tidbits of tech useful. So I decided to go down the route of countless others on the internet today: start a blog. This isn’t my first attempt at “blogging”. I had a short lived blog which was written using one of the first versions of Movable Type. That was quite some time ago considering Movable Type was released in 2001. While I could have consulted the handy “Blogging for Dummies” book, I did consult 16 Ideas To Avoid Complete and Utter Failure. Fairly useful and has helped shaped the blog into what it is today. One of my personal traits regarding technology is that I like to get my hands dirty. While I could have gone the easy route by choosing a somewhat preconfigured site like Blogger or a hosted solution provided by WordPress, I wanted to be able to control my own destiny (like a team choosing to go last in a shootout). I chose WordPress, as emphasized by the aforementioned best practices document, from the countless blogging software options available. The next step was finding a home. I have a number of domain names in my possession and since this was a personal blog, I decided to fall back to andyserver.com which happens to be the oldest in my collection. This domain was never hosted by any hosting provider and was once hosted out of my basement. To avoid paying a hosting provider to house this blog, I turned to a Platform as a Service (PaaS). A Platform as a Service is a way to rent hardware and other services to deploy and run applications. Red Hat’s OpenShift platform was a perfect match to house my blog as it allowed me to get my hands dirty with the configuration and management, but more importantly, it was free! The rest of this post will explain the steps necessary to spin up a WordPress blog on the OpenShift platform.
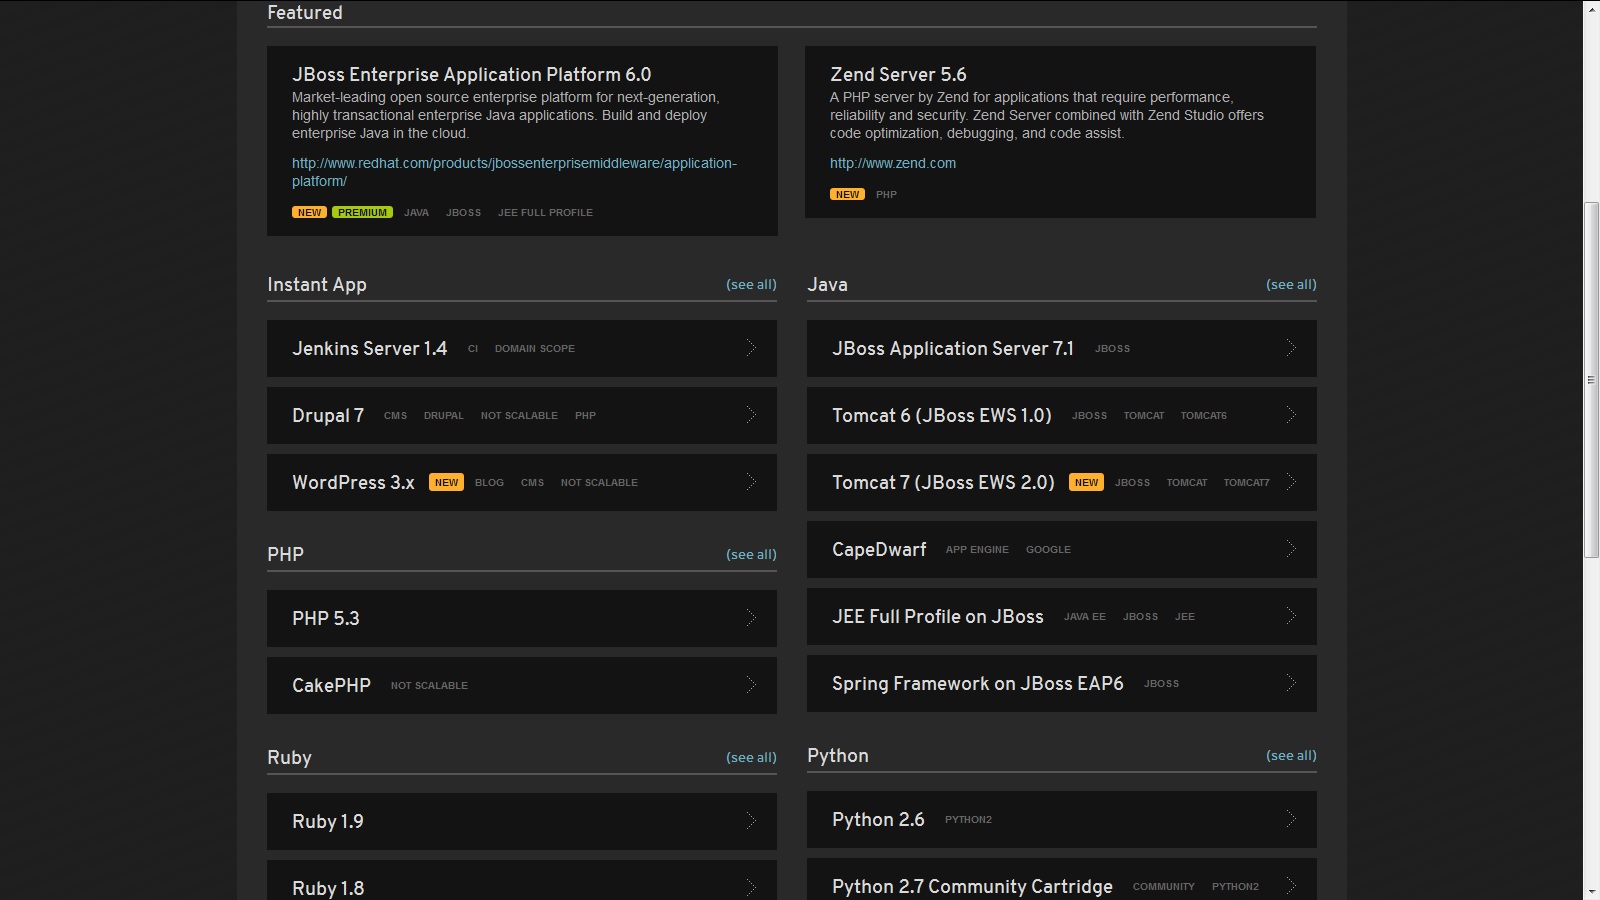
To get started, first create an Openshift account at http://openshift.com. After registering and confirming your email, you are presented with a list of possible applications types to create. These types range from Java, Ruby, Python amongst many others.
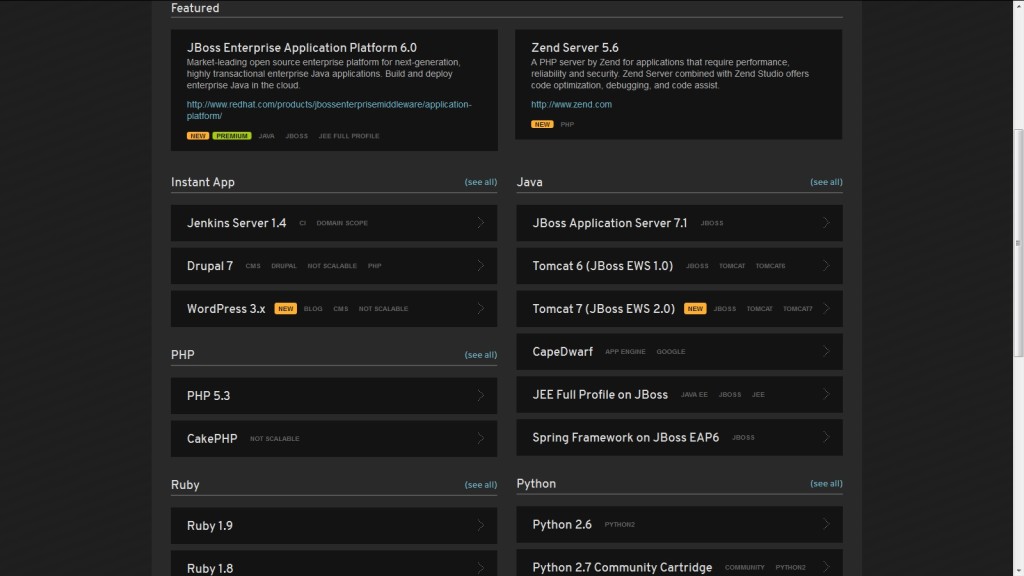
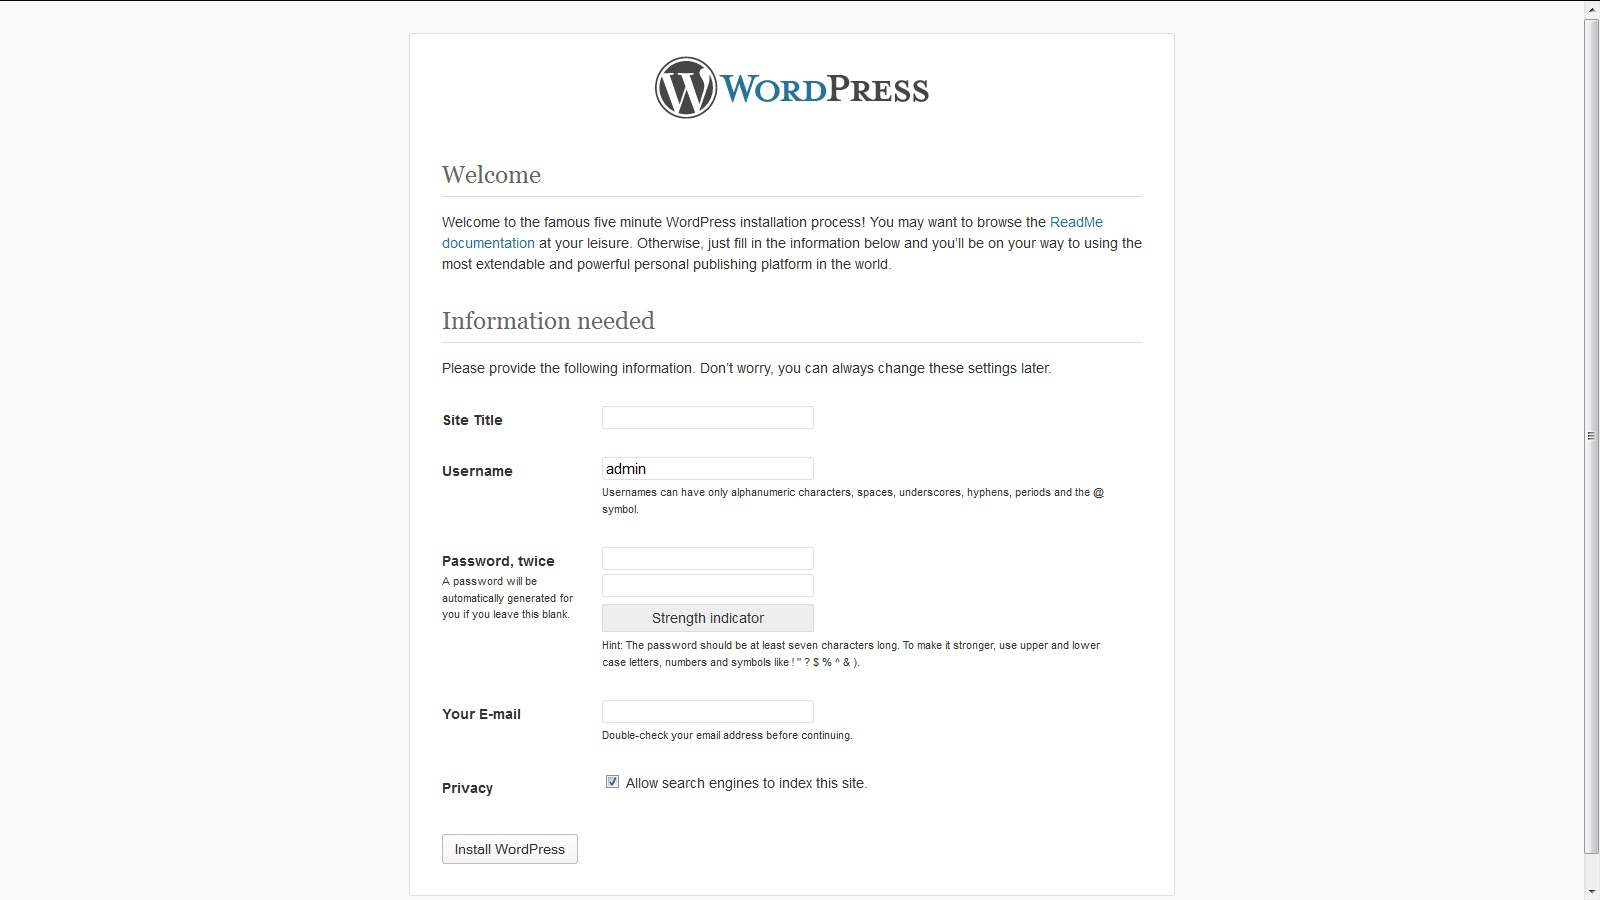
In addition, there are a number of preconfigured applications (called instant apps) which will allow for apps to be spun up even faster. One of these options is WordPress which will package and configure PHP, MySQL, and the WordPress software. Perfect! Once this is selected, you are asked to create a name for your application and if this is the first OpenShift application, you are also asked to create a namespace for your OpenShift account. A namespace is essentially a subdomain for all of the applications you deploy. Once a namespace is set, it cannot be changed so be sure to think long and hard on this name. Go ahead and click Create Application to create the application. Once the application has been created, you are presented with a page detailing key information about your application such as MySQL connection information and the publicly accessible URL for the application. Clicking on this URL initially redirects to the WordPress initial configuration page where basic WordPress settings are made.
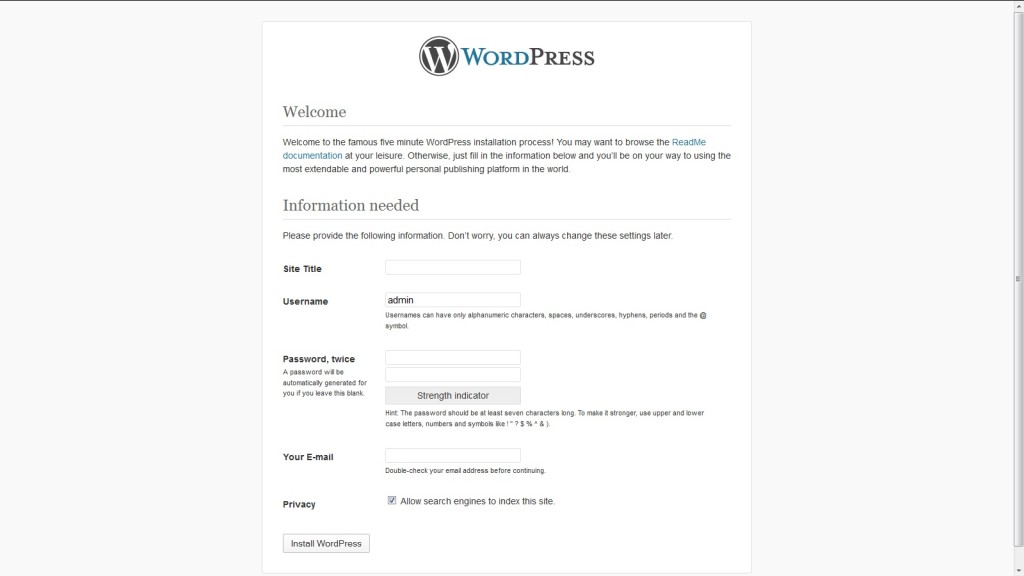
Also on this page is a link to key documentation to the the initial installation and configuration process. Enter the required information and select Install WordPress. Once successful, you will be able to login to the WordPress Administration Console using the username and password previously configured. I’ll forgo the discussion on configuring WordPress, but consult the full documentation to learn more on how to manage your blog’s settings, modify the appearance, and add plugins to expand functionality.
Currently the blog is accessible at a URL such as [app_name]-[namespace]-rhcloud.com as previously configured. Not too easy to remember and certainly not in the andyserver.com domain as we desire. OpenShift has the ability to leverage cname (Canonical Name) records of DNS. This will allow us to use an address such as blog.andyserver.com and have all requests transparently redirect to our OpenShift application address. Full instructions of this process can be found here, but we will go over the high level steps. Configuration needs to occur both within OpenShift and with the DNS provider of the andyserver.com domain. Add a new cname value such as the following configuration:

With the configuration now complete on the domain side, we now turn to the OpenShift configuration. While a number of application configuration options can be managed through the online management console, some configurations cannot. The management of cname records cannot be managed online and must be leveraged through the OpenShift command line tools. Available for Windows, Mac and Linux platforms, these tools provide full configuration and management of OpenShift applications. Detailed installation and configuration of these tools with your machine can be found on the Installing RHC Client Tools page.
After completing the processes detailed in the installation documentation, the RHC Client tools and git should be installed on your machine. In addition, running the rhc setup command should have walked you through the initial configuration steps such as generating an SSH key which can be used to configure access to your account through the command line tools. Full OpenShift documentation is available by consulting the User Guide. Once all of these steps have been completed, the rhc alias command can be run to add an alias to an application:
rhc alias add <application_name>
For the blog application, we would issue the command:
rhc alias add blog blog.andyserver.com
If the command was successful, the alias can be verified on the application properties page of the OpenShift web management console under the alias section. With the configurations now complete on both the domain and OpenShift side, try to access the blog using the cname address. Keep in mind that even though both steps were completed successfully, your application may not be reachable due to the DNS propagation delays. Once your site is reachable by its cname value, the final step is to configure the base URL within WordPress. Login to the administration console of your blog and navigate to the General page under the Settings section. Set the WordPress Address and Site Address URL to your cname value.
Congratulations, your blog is up and accessible by your countless followers. And that is how we got to this point. We started off introducing the Block 87 blog. We then introduced the OpenShift platform not only as a way to deploy and run applications in the cloud, but how to get a blog of your own like this one up and running. This is only a taste of things to come. Stay tuned.


Recent Comments