A container image is a foundational component of any deployable resource in Kubernetes as it represents an executable workload. However, all images are not the same. An image with the name foo deployed on cluster A may not be the same as image foo on cluster B. This is due in part to the way that images are resolved at both the Kubernetes level as well as by the underlying container runtime.
When using Helm, the package manager for Kubernetes, the majority of publicly available charts do provide methods for specifying names of these backing images. Unfortunately, these options can lead end users into a false sense of security. In this post, we will describe the potential pitfalls that can occur when specifying image references within Helm charts along with options that can be employed by both chart maintainers and consumers to not only increase security, but reliability of their Kubernetes applications.
Whats in a Name
All container images are given names, such as the foo image referenced previously. In addition, a hostname and any hierarchical details of the registry where the image is stored may also be provided, such as quay.io/myco resulting in an image name of quay.io/myco/foo. If the hostname of the registry is not provided, a default hostname is provided by the container runtime. Either a set of configured additional or mirror registries are used, otherwise Docker Hub is the default.
The final optional portion of an image is a tag which identifies different versions of the same image. If no tag is specified, the latest tag is used by default. In Helm, a common pattern employed by chart publishers is to provide configurable values for each component of an image and typically represented by the following values:
While this configuration appears to be sensible given the composition of images, there are additional considerations that should be taken into account.
First, Kubernetes takes different approaches when it comes to satisfying the requirement that the image be available within the local container runtime. By default, the Kubernetes Kubelet will query the container runtime for the specified image. If found, a container will be started using this image. If the image is not found, it will be retrieved by the container runtime based on the configuration in the deployable resource. End users can modify this default behavior by specifying the imagePullPolicy property of the container. The imagePullPolicy can be one of the following values:
IfNotPresent (default) – Pull the image from the remote source only if it not present in the container runtime
Always – The Kubelet queries the remote registry to compare the digest value of the image. The image will be retrieved only if an image with the same digest is not found within the container runtime.
Never – Assumes the image is already available in the container runtime
Many chart maintainers provide the imagePullPolicy as a configurable value within their charts in order to allow the end user to control how images are retrieved.
There is one gotcha here. Even though the default imagePullPolicy is IfNotPresent, if the latest tag is specified, the imagePullPolicy is changed to Always when not specified. This subtle detail has been known to trip up even the more experienced Kubernetes user as a different image may be retrieved compared to a previous deployment even though no changes to the Kubernetes resource were made.
So, how can we avoid this type of situation?
Referencing Images by Digest
It is important to note that an image tag functions as a dynamic pointer to a concrete reference, known as a digest. A digest is an immutable SHA256 representation of an image and its layers. An image deployed yesterday with tag 1.0.0 may not reference the same underlying digest as it does today, which could cause adverse results depending on the contents of the updated image. Tags are provided for convenience purposes. It’s a lot easier to say “give me version 1.0.0” instead of “give me version image with reference sha256:d478cd82cb6a604e3a27383daf93637326d402570b2f3bec835d1f84c9ed0acc. Instead of using a tag to reference an image, such as quay.io/myco/foo:1.0.0, digests can be applied by adding @sha256:<digest> instead of the colon separator and tag name, such as quay.io/myco/foo@sha256:d478cd82cb6a604e3a27383daf93637326d402570b2f3bec835d1f84c9ed0acc.
Referencing images by digest has a number of advantages:
Avoid unexpected or undesirable image changes.
Increase security and awareness by knowing the specific image running in your environment.
The last point is increasingly important as more and more organizations look to tighten the grips on the software that is deployed. When combined with concepts like Software Bill of Materials (SBOM’s), it is crucial that the exact image that is defined matches the running image.
Supporting Image Digest in Helm Charts
Given that referencing a container image by digest merely involves a change in a Helm template, it should be fairly easy to implement. The primary challenge with this refactoring effort is the way the image itself is referenced. When using a Values structure for a image similar to the example provided previously, an image within a template file could be represented by the following:
The colon separator prior to the image tag presents the primary reason why using image digests is a challenge in most of the publicly available Helm charts since an image digest reference uses a @ after the name of the image instead of a :.
Note: It is possible to include the digest when using the above format as @sha can be suffixed to the name of the image. However, this approach is not recommended as it may affect other portions of the chart that may rely on the name of the image.
Freedom of choice is the name of the game, and chart maintainers (particularly those that support publicly available charts) should provide suitable options for consumers to choose from. While referencing images by digest does have many benefits as described previously, there is still a need to support those that may want the convenience of referencing an image by tag.
To satisfy both user personas, we can make use of a Helm Named Template to produce the desired image reference based on user input. A Named Template in Helm is a piece of reusable code that can be referenced throughout a chart.
First, let’s spend a moment reviewing thinking about how users should be able to specify the image so that the image reference can be correctly produced. Currently, as illustrated previously, the images dictionary accepts the name of the registry, repository and tag. Since the goal of this effort is to be able to support either a tag or a digest, let’s change the name of the tag property to version:
Now either a tag (such as 1.0.0) or a digest (such as sha256:d478cd82cb6a604e3a27383daf93637326d402570b2f3bec835d1f84c9ed0acc) can be specified in the version property.
The next step is to create the Named Template that will be able to produce the correctly formatted image reference. Named Templates, by default, are defined within the templates/helpers.tpl file (Any file starting with can be used to store Named Templates as it is convention in Helm that these files do not contain any Kubernetes manifests). The key to properly formatting the image reference is to be able to differentiate when the input is a tag versus a digest. Fortunately, since all image digests begin with sha256:, logic can be employed to apply the appropriate format when this situation is detected. The result is a Named Template called similar to the following:
{{/*
Create the image path for the passed in image field
*/}}
{{- define "mychart.image" -}}
{{- if eq (substr 0 7 .version) "sha256:" -}}
{{- printf "%s/%s@%s" .registry .repository .version -}}
{{- else -}}
{{- printf "%s/%s:%s" .registry .repository .version -}}
{{- end -}}
{{- end -}}
This Named Template called mychart.image first determines whether the first 7 characters of the version property contains sha256: using the Sprig substr function, which would indicate that it is an image digest reference. If so, a correctly formatted image reference is produced with the appropriate @ separator between the registry/repository and the digest. Otherwise, an image reference making use of a tag is produced.
The final step is to include the mychart.image Named Template within a Kubernetes template manifest. This is achieved by using the template function and providing both the name of the Named Template and the dictionary containing the image from the Values file.
Now, specifying either the tag or digest in the version property within a Values file as shown below will result in a properly formatted image reference.
By implementing this type of capability, chart producers enable consumers the flexibility for determining how images within charts should be rendered. The use of image digests has many benefits including security and an increased level of assurance of the content that is operating within a Kubernetes environment. It is the hope these types of patterns continue to proliferate within the Helm community.
OpenShift includes the capabilities to integrate with a variety of identity providers to enable the authentication of users accessing the platform. When an OpenShift cluster is installed, a default kubeadmin administrator user is provided which enables access to complete some of the initial configuration, such as setting up identity providers and bootstrapping the cluster.
While steps are available to remove the kubeadmin user from OpenShift, there may be a desire for the account to be retained longterm as one of the break glass methods for gaining elevated access to the cluster (another being the kubeconfig file that is also provided at installation time and uses certificate based authentication).
In many organizations, policies are in place that require accounts with passwords associated with them to be rotated on a periodic basis. Given that the kubeadmin account provides privileged access to an OpenShift environment, it is important that options be available to not only provide additional security measures for protecting the integrity of the account, but to also comply with organizational policies.
The credentials for the kubeadmin password consists of four sets of five characters separated with dashes (xxxxx-xxxxx-xxxxx-xxxxx) and is generated by the OpenShift installer and stored in a secret called kubeadmin in the kube-system namespace. If you query the content stored within the secret, you will find a hashed value instead of the password itself.
To properly rotate the kubeadmin password, a new password must be generated in a format that aligns with OpenShift’s standard kubeadmin password format followed by a hashing function being applied so that it can be stored within the platform.
There are a variety of methods in which a password representative of the kubeadmin user can be generated. However, it only made sense to create a program that aligns with the functions and libraries present in the OpenShift installation binary. The following golang program performs not only the generation of the password and hash, but the base64 value that should be updated in the secret as a convenience.
package main

import (
	"fmt"
	"crypto/rand"
	"golang.org/x/crypto/bcrypt"
	b64 "encoding/base64"
	"math/big"
)

// generateRandomPasswordHash generates a hash of a random ASCII password
// 5char-5char-5char-5char
func generateRandomPasswordHash(length int) (string, string, error) {
	const (
		lowerLetters = "abcdefghijkmnopqrstuvwxyz"
		upperLetters = "ABCDEFGHIJKLMNPQRSTUVWXYZ"
		digits       = "23456789"
		all          = lowerLetters + upperLetters + digits
	)
	var password string
	for i := 0; i < length; i++ {
		n, err := rand.Int(rand.Reader, big.NewInt(int64(len(all))))
		if err != nil {
			return "", "", err
		}
		newchar := string(all[n.Int64()])
		if password == "" {
			password = newchar
		}
		if i < length-1 {
			n, err = rand.Int(rand.Reader, big.NewInt(int64(len(password)+1)))
			if err != nil {
				return "", "",err
			}
			j := n.Int64()
			password = password[0:j] + newchar + password[j:]
		}
	}
	pw := []rune(password)
	for _, replace := range []int{5, 11, 17} {
		pw[replace] = '-'
	}

	bytes, err := bcrypt.GenerateFromPassword([]byte(string(pw)), bcrypt.DefaultCost)
	if err != nil {
		return "", "",err
	}

	return string(pw), string(bytes), nil
}

func main() {
        password, hash, err := generateRandomPasswordHash(23)

        if err != nil {
           fmt.Println(err.Error())
           return
        }
	fmt.Printf("Actual Password: %s\n", password)
	fmt.Printf("Hashed Password: %s\n", hash)
	fmt.Printf("Data to Change in Secret: %s", b64.StdEncoding.EncodeToString([]byte(hash)))
}
If you do not have the go programming language installed on your machine, you can use the following link to interact with the program on the Go Playground.
Hit the Run button to execute the program and a response similar to the following will be provided:
Actual Password: WbRso-QnRdn-6uE3e-x2reD
Hashed Password: $2a$10$sNtIgflx/nQyV51IXMuY7OtyGMIyTZpGROBN70vJZ4AoS.eau63VG
Data to Change in Secret: JDJhJDEwJHNOdElnZmx4L25ReVY1MUlYTXVZN090eUdNSXlUWnBHUk9CTjcwdkpaNEFvUy5lYXU2M1ZH
As you can see, the plaintext value that you can use to authenticate as the kubeadmin user, the hashed value that should be stored in the secret within the kube-system namespace and the value that can be substituted in the secret is provided.
To update the value of the kubeadmin password, execute the following command and replace the SECRET_DATA text with the value provided next to the “Data to Change in Secret” from the program execution above.
Once the password has been updated, all active OAuth tokens and any associated sessions will be invalidated and you will be required to reauthenticate. Confirm that you are able to login to either the OpenShift CLI or web console using the plain text password provided above.
It really is that easy to manage the password associated with the kubeadmin user. The ability for the password to be rotated as desired allows for the compliance against most organizational password policies. Keep in mind that the secret containing the kubeadmin password can always be removed, thus eliminating this method for authenticating into the cluster. The generated kubeconfig file provided at install time can be used as a method of last resort for accessing an OpenShift environment if a need arises.
GitOps, the process for declaring the state of resources in a Git repository, has become synonymous with managing Kubernetes, and one of the most popular GitOps tools is Argo CD. The ability to drastically reduce the time and effort required to manage cluster configuration and associated applications has further accelerated the adoption of Kubernetes. However, as Kubernetes becomes more commonplace, there becomes a need to segregate the levels of access granted to users and tools to enable the proliferation of the technology.
In many enterprise organizations and managed services offerings, multi-tenancy is the norm and access is restricted for the types of operations that can be performed. This poses a challenge for Argo CD, which by default, manages resources at a cluster scope, meaning that it will attempt to perform operations across all namespaces, effectively breaking multi-tenancy. Contributors to the Argo CD project realized this concern early on and actually added support for namespace isolation back in version 1.4. Unfortunately, the namespace isolation feature in Argo CD is poorly documented, with most end users being unaware of such functionality. This article will illustrate the namespace isolation feature of Argo CD, how it can be used, as well as some of the limitations that currently exist.
Argo CD can be deployed to a Kubernetes environments in several ways:
The only method that currently supports namespace isolation is through the use of raw manifests and a separate manifest for namespace isolation has been included with each Argo CD release since version 1.4 (You can find the manifests on the releases page of Argo CD. The name of the file is called namespace-install.yaml instead of install.yaml for both the standard and highly available deployment).
The typical deployment of Argo CD creates two ClusterRoles:
Argo CD server – to provide the necessary level of access for resources that are made available through the browser, such as viewing logs from pods or events within namespaces.
Argo CD application controller – Full, unrestricted access to manage resources in a cluster as declared by the manifests from the Git repository
Any unprivileged user would be unable to successfully apply these resources which required the creation of a separate set of manifests. When using the set of manifests that supports namespace isolation, instead of ClusterRoles being created at a cluster scope, Roles and associated RoleBindings are created in the namespace where Argo CD is deployed. In addition, the Argo CD controller is granted only a limited number of resources instead of full access. The process for which Argo CD can apply and manage the resources that are declared in Git repositories will be described later on.
Deploying Argo CD in Namespace Isolation Mode
To demonstrate how the namespace isolation feature of Argo CD can be used, an OpenShift Container Platform environment will be used (any Kubernetes environment will work, however there are several considerations that need to be made when running in OpenShift).
First, obtain access to an OpenShift environment and create a new project called argocd which will be where the set of Argo CD resources will be deployed:
For this demonstration, version 1.7.8 was used. Feel free to replace with a version of your choosing.
After applying the manifests, the resources will be deployed. You may notice that the Deployment for Redis will not be running. As of version 1.7, the Redis deployment has considerations for ensuring that the container does not run as the root user. The configuration in the pod securityContext conflicts with the standard security mechanisms employed in OpenShift through the use of Security Context Constraints (SCC’s). Given that OpenShift already enforces that all pods by default run with a non-root user using a randomly generated ID, the value in the securityContext field can be safely removed.
Execute the following command to patch the deployment to remove the field from the Deployment:
The hostname for the route created can be found by executing the following command:
$ oc get route argocd -o jsonpath='{ .spec.host }'
Argo CD supports several methods for securing access to the server, including SSO. The most straightforward is to use the out of the box integrated authentication provider. By default, the password of the admin password is set as the name of the pod the first time the Argo CD server starts
The Argo CD CLI can be used to change the admin password so that if the server pod restarts, the password will not be lost.
Login to the Argo CD CLI:
$ argocd --insecure --grpc-web login "$(oc get routes argocd -o jsonpath='{ .spec.host }')":443 --username "admin" --password "$(oc get pod -l app.kubernetes.io/name=argocd-server -o jsonpath='{.items[*].metadata.name}')"
Set the admin password for Argo CD to be “password” by executing the following command
$ argocd account update-password --current-password=$(oc get pod -l app.kubernetes.io/name=argocd-server -o jsonpath='{.items[*].metadata.name}') --new-password=password
With the default password changed, launch a web browser and navigate to the url of the route discovered previously. Enter the admin username and password to access the console.
Namespace Isolation
Clusters define the Kubernetes environments for which resources will be deployed to. A cluster can be either the environment Argo CD is deployed on or a remote instance. When Argo CD is first deployed, a single local cluster is created called in-cluster which references the local environment for Which Argo CD is running on and communicates against the internal Kubernetes service (https://kubernetes.default.svc). If we were to create an application that attempted to manipulate cluster level resources, the process would fail as the Argo CD does not have the necessary permissions. As described previously, Argo CD uses the argocd-application-controller service account to manage resources and this service account has a ClusterRoleBinding against a ClusterRole with unrestricted permissions. In a namespace deployment of Argo CD, this level of permission does not exist and the service account is only granted a limited level of access to manage Argo CD related resources and internal functions.
For Argo CD to be able to function as desired, access to namespaces must be explicitly granted. This process requires the use of the Argo CD CLI and the argocd cluster add subcommand to specify the namespaces that should be granted access to manage.
Create a namespace called argocd-managed for which we will be able to test against
The --skip-config-write option was specified to avoid changing into the newly created project since the majority of our actions will remain in the argocd project.
To grant Argo CD access to manage resources in the argocd-managed project, add a new cluster called “argocd-managed” using the following command:
You may have noticed a few interesting options in the above
--name – Friendly name of the cluster --in-cluster – Specifies that the internal Kubernetes service should be used to communicate with the OpenShift API. --system-namespace – Configurations for clusters managed by Argo CD are typically written to a secret in the kube-system namespace. As the kube-system namespace requires elevated access, the argocd namespace for which Argo CD is deployed within will be used instead --namespace – Namespace that Argo CD should be granted access to manage. Multiple iterations of the namespaces parameter can be specified in the argocd cluster add command to manage multiple namespaces.
The command will then return the following result.
INFO[0002] ServiceAccount "argocd-manager" created in namespace "argocd"
INFO[0002] Role "argocd-managed/argocd-manager-role" created
INFO[0003] RoleBinding "argocd-managed/argocd-manager-role-binding" created
Cluster 'https://kubernetes.default.svc' added
A new service account called argocd-manager is created in the argocd namespace along with a role and rolebinding in the targeted namespace that grants the argocd-manager service account unrestricted privileges.
The details for the cluster are written in a secret in the argocd</code namespace and contain the following key properties:
name – Friendly name for the cluster
server – Hostname for the cluster
config – json data structure describing how to communicate with the cluster
The bearerToken that is defined in the cluster config is associated with the newly created argocd-manager service account which was granted access in the argocd-managed namespace. The namespaces field is a comma separated list of namespaces that Argo CD can manage resources against .
Let’s demonstrate that Argo CD can be used to deploy resources against the argocd-managed namespace and validate namespace isolation.
Using the Argo CD CLI, create a new application called nexus to deploy a Sonatype Nexus instance:
You can verify the application in the Argo CD web console using the route, username and password that was previously created.
By selecting the nexus application, you will be presented with a depiction similar to the following indicating Argo CD was successfully configured for namespace isolation:
Note: You may ignore the “OutOfSync” message as it is indicating that the live OpenShift Route for Nexus within the cluster contains differences than the manifest declared. These types of situations are managed through the use of customizing the differences.
Validating Namespace Isolation Enforcement
The enforcement of namespace isolation can be validated using multiple approaches. First, Argo CD will forbid the management of resources in a cluster that is not specified by a value present in the namespaces field of the cluster configuration when configured in namespace isolation mode. Otherwise, standard Kubernetes RBAC will forbid the argocd-application-controller service account from managing resources in a namespace it cannot access.
Let’s validate this assessment by creating a new namespace called argocd-not-managed and attempt to deploy the same nexus application.
Verify the application was not successfully deployed either in the ArgoCD web console or using the command line by executing the following command:
$ argocd app get nexus-not-managed

Name: nexus-not-managed
Project: default
Server: https://kubernetes.default.svc
Namespace: argocd-not-managed
Repo: https://github.com/redhat-canada-gitops/catalog
Target:
Path: nexus2/base
SyncWindow: Sync Allowed
Sync Policy: Automated
Sync Status: Unknown (5978975)
Health Status: Missing

CONDITION MESSAGE LAST TRANSITION
ComparisonError Namespace "argocd-not-managed" for Service "nexus" is not managed 2020-11-15 23:12:28 -0600 CST

GROUP KIND NAMESPACE NAME STATUS HEALTH HOOK MESSAGE
PersistentVolumeClaim argocd-not-managed nexus Unknown Missing
Service argocd-not-managed nexus Unknown Missing
apps.openshift.io DeploymentConfig argocd-not-managed nexus Unknown Missing
image.openshift.io ImageStream argocd-not-managed nexus Unknown Missing
route.openshift.io Route argocd-not-managed nexus Unknown Missing
Notice how under the condition, it explains that the application cannot be deployed to the argocd-not-managed namespace as it is not managed in this cluster, thus validating namespace isolation is functioning as expected.
Namespace Isolation Automation
The primary goal of Argo CD is to apply resources that are expressed in a declarative manner. The Argo CD server itself embraces declarative configuration through the use of Custom Resource Definitions, Secrets and ConfigMaps and given that the argocd cluster add command creates a series of resources itself, we can avoid having to use the Argo CD CLI to manage cluster configuration by being able to specify them in a declarative fashion.
Let’s automate the steps that the argocd cluster add command performs. Recall, the command added a Service Account, Role, RoleBinding and Secret.
Note: It is best to have a fresh environment of Argo CD available to work through these steps. To reuse the existing environment, execute the following command which should reset the environment to a semi-clean state.
Finally, the cluster secret can be created. Execute the following command to create the secret which will contain the bearer token for the argocd-manager service account and the namespace that the cluster will manage (among a few others).
Notice how the secret created above contains the label argocd.argoproj.io/secret-type: cluster. Any secret with this label will be interpreted by Argo CD as a cluster secret.
At this point, Argo CD has been set up in the same manner as the CLI. This type of configuration affords greater flexibility and avoids needing to use the Argo CD CLI to perform common and repeatable configurations. Feel free to repeat the application creation and deployment as described previously to confirm a successful synchronization of resources into the cluster.
Additional Forms of Restricting Access
Aside from using namespaces and clusters to limit access to where resources can be deployed, Argo CD does have other constructs available for supporting multi-tenancy. Projects allow for a logical grouping of applications and policies within Argo CD and can either supplement or act as a replacement for the namespace isolation feature.
For example, there may be a need for a single Argo CD instance to be deployed with access to manage cluster level resources instead of separate instances, but still provide some form of isolation between teams. By using a combination of Argo CD projects and RBAC, this can be achieved.
Projects provide the capability to limit the source repositories containing content (Git), the clusters resources can be deployed to, the namespaces, and the types of resources that can be deployed in a whitelist/blacklist fashion, both at a cluster and namespace scope. Finally, RBAC policies through the use of group association can be applied to determine the rights that users have against projects.
While projects do provide a finer grained access mode and configuration model, it does require additional work in order to achieve the desired rights granted to users. Since Argo CD is deployed with rights to manage resources at a cluster level, it is imperative that proper considerations be made in order to protect the integrity of the cluster as well as to restrict the level of access that can be achieved by various tenants.
Limitations of Argo CD Namespace Isolation
While the namespace isolation feature in Argo CD does provide a path towards supporting true multi-tenancy, there are still additional hurdles that must be overcome (as of version 1.7.8) before it can be achieved. An Argo CD cluster configuration provides a method for specifying the Kubernetes cluster URL, credentials that can be used to communicate with the cluster, as well as the namespaces that resources can be deployed to. However, regardless of the number cluster configurations made against a single cluster, only one can be active at a time. This gap limits being able to use the namespace isolation feature to provide access to a namespaced scoped deployment of Argo CD and provide two separate teams that manage different namespaces the ability to easily manage their own set of resources without the knowledge of each other.
The other limitation, as described near the beginning of the article is the lack of documentation around the support for namespace isolation. It may be possible that you, the reader, are learning about this feature. If there was more awareness of this type of functionality, existing issues could be resolved and new features could be developed to expand the potential capabilities.
The creators and community surrounding Argo CD realize that multi-tenant support is important for broader adoption of the tool into enterprise organizations and those with a high security posture. The namespace isolation feature is a great first step, but additional work still needs to be achieved. For now, the recommended approach is to deploy separate namespace scoped instances of Argo CD for teams that do not require access to cluster scoped resources and are looking to leverage a specific set of namespaces. Fortunately, given that Argo CD emphasizes declarative configuration, the implementation can be easily achieved.
One of the features introduced in JBoss Fuse 6.2 is the ability to utilize Role Based Access Control (RBAC) to govern the capabilities authenticated users have when interacting with the container. RBAC is important because it allows for a delineation of the roles and responsibilities of users managing the Fuse container to exist. For example, a team may have a set of individuals who manage the configuration of the container including all deployed applications in a system administrator role while another team may have a set of individuals whom have the responsibility for monitoring the state of deployed application. RBAC provides the ability to restrict access to the monitoring team to only view the state of the container in a read only manner while providing unrestricted access to the administrator team. Fuse and the underlying Karaf container provide a flexible framework for configuring and managing Role Based Access Control configurations. RBAC was initially introduced in Karaf 3.0.0 and subsequently ported back version 2.4.0 for which Fuse is based off of.
Fuse provides a number of standard roles that can be applied to users. These roles are defined in the following table:
Roles
Description
Monitor, Operator, Maintainer
Read only access
Deployer, Auditor
An appropriate level or read-write access who want the ability to deploy and run applications, but blocks access to sensitive container
Administrator, SuperUser
Unrestricted access to the container
The enforcement of Role Based Access Control in Fuse is accomplished with the help of two mechanisms: JMX Guard and OSGi guard. JMX guard is a mechanism that is configured at the JVM level to intercept all invocations made against the JMX interface, similar to a Servlet Filter. As an invocation is made, JMX guard verifies the requestor has the appropriate permissions and based on the assentation, they are either granted access to the resource or denied. OSGi guard on the other hand governs the ability to invoke methods on an OSGi service in the form of a proxy between the client and the service. Both JMX and OSGi guard use Access Control List’s (ACL’s) for declaring the methods and services that are to be secured and the roles that have access. All of the ACL files are located within the etc/auth folder of Fuse. There are two types of ACL’s, JMX and command based. Default configurations have been provided, but you are free to modify and customize as necessary.
There are four primary locations where RBAC is enforced:
JMX – Direct invocations are protected by JMX Guard
Fuse Management Console – Communicates using REST via Jolokia technology. Since Jolokia it is situated on top of the JMX, it affords the same protection that JMX provides
Karaf commands – Enforcement is provided whether commands are entered on the virual terminal in the Fuse Management Console, remote connection via SSH or using the CLI
OSGi Services – Protections against invocations of individual methods
Applying roles to users is dependent on the authentication scheme being used. By default, Fuse comes enabled with the PropertiesLoginModule which utilizes a configuration file located at etc/users.properties to define the authentication and authorization of users. Users can be added one line at a time in the file in the following format:
username=password,role1,role2…
For example, to configure a user called monitor with password monitor and the role Monitor, it would appear in the following format:
monitor=monitor,Monitor
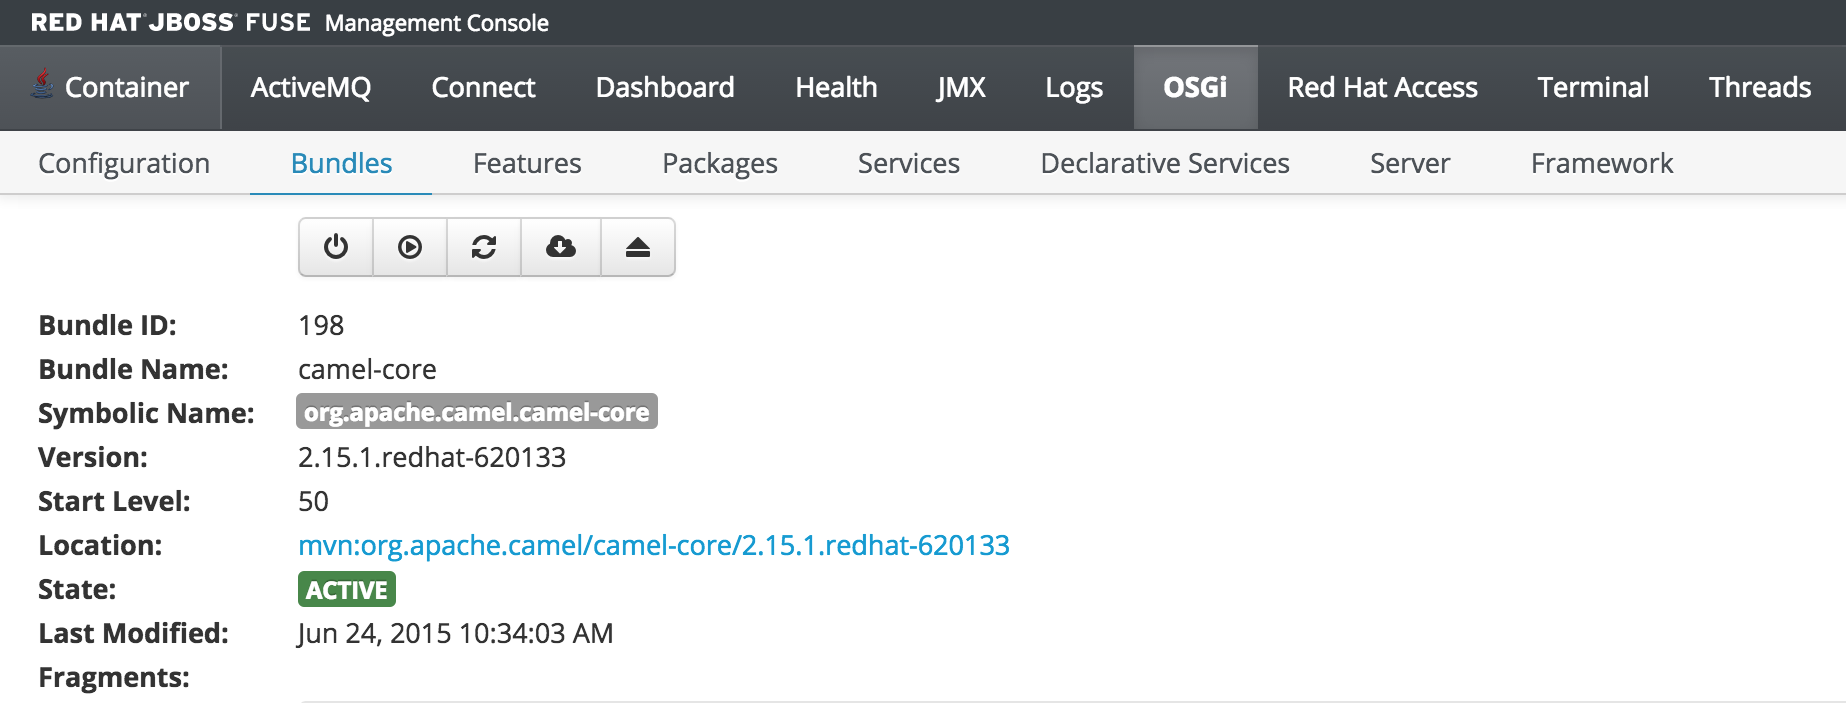
As previously discussed, users who have the monitor role have a read only view of the container. To validate proper enforcement of this role to this newly created user, start up the Fuse container and navigate to the Fuse Management Console at http://localhost:8181. Enter monitor for both the user name and password and click login to access the console. Navigate to the OSGi tab to view the current status of the components running in the OSGi container. The list of installed bundles within the container are shown by defaults and can be sorted and filtered if desired. Select the camel-core bundle. When logged in as a user with access to modify components, a dialog is available for starting, stopping, updating and refreshing the bundle as shown below:
But since the monitor user only has read access, this dialog will not be present and the view will appear as the following:
This type of read only protection is also extended to other core components of the Fuse Management Console such as ActiveMQ and Camel JMX pages and can be further customized. With the inclusion of Role Based Access Control support, it is now even easier to manage and govern access to the JBoss Fuse platform. A full description of the features and capabilities of Role Based Access control can be found in the JBoss Fuse product documentation.


Recent Comments